Showing posts with label Paper. Show all posts

Sunday, 4 May 2014

Year of the Frog

Hello.  Welcome.  I don't know about you but I always think twice about using foreign words and phrases on projects.  Especially oriental characters because you are never sure what you are saying.  Living in a country where English is not the first language I am only too aware of how many times I have innocently strung together a phrase only to find the locals ROFL or occasionally earning a shocked look.  I prefer ROFL.  At least I am keeping them entertained.  


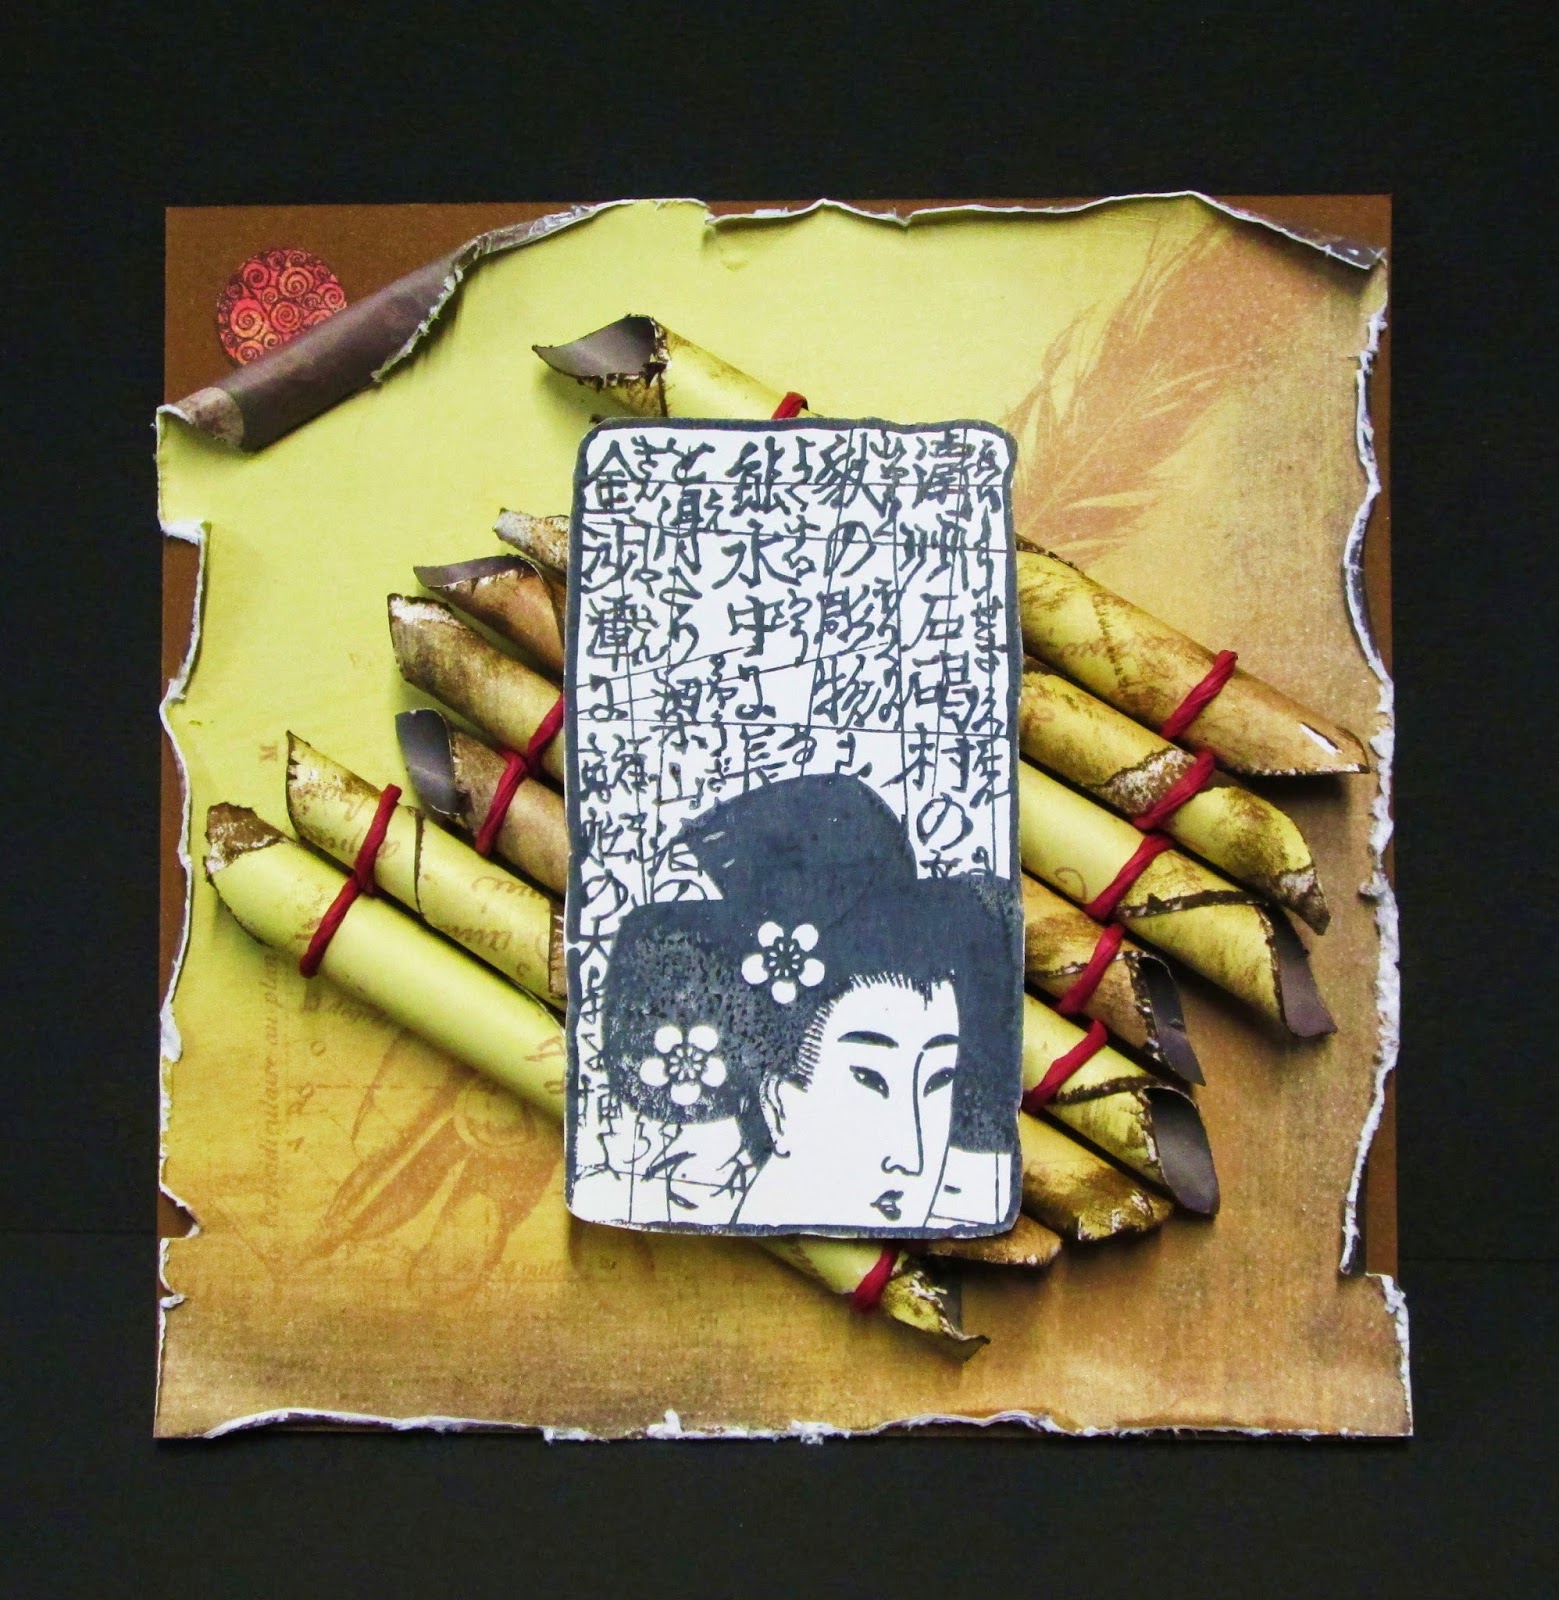
My third and final entry for the PaperArtsy inspired by #3UPers, this time Susan's paper rolls post.  I've used a brown card base and layered with PaperArtsy Chatsworth Papers.  Gave the edges some serious distress and abuse, but they can take it.  Used the same paper for the rolls and some paper string.  The image is from LPC022 and the little stamp with the red tint from PaperArtsy SIEN10F.  I was going to use a chinese character in the top right but my phobia about putting it upside down or backwards held me back.  That said would anyone care to hazzard a guess on the text on that stamp?  It could be from the Perfumed Garden or maybe just a weather forecast!  See, mad scientist brain working overtime again.....

Joining the fun at
PaperArtsy
Simon Says Stamp Wednesday Challenge - Anything Goes 

Thanks for dropping by and all your lovely comments.  I know I've been busy and that you are too and I do appreciate you taking the time to visit, view and comment on my projects.   Big hugs. 

Wednesday, 30 April 2014

Science of a Snowflake

Hello. Welcome.  This is a follow up to last nights post over at the PaperArtsy blog.  I wanted to share a few more photos, tips and how tos in the hopes you may be inspired to make your own anyday snowflake.  If you want to just go for it then there are very good instructions here but for those who are a little unsure or are interested to see what happens when you cross a scientist with a crafter read on.

Here's what we are making


I've used the gorgeous Chatsworth Paper Collection and two PaperArtsy dies, Spotty Dragonfly and Moth.   It looks complex and beautiful.  It's really easy.  But still beautiful.  The scientist in me delights that I found a formula that works whatever size you want to make.  I didn't want a crease across the papers so I drew the cut lines on each piece with a pencil, cut with a knife and then rubbed out the pencil lines.  To find your cut lines....


OK, it's not pretty but blogger isn't being very co-operative!!  First you need a square of double sided paper and a ruler or, as in this case, a piece of card with a width 1/10th the size of your paper.  I used 15cm paper so my measure is 15mm wide.  20cm paper 2cm wide measure.  For our friends across the pond 10 inch paper 1 inch wide measure, 8 inch paper uhhh...  Oh, you get the idea.  Draw a diagonal Line A.   Draw a diagonal the other way and also a line the other side of the measure Lines B.  This gives you your no cut zone.  Lay the measure along the edge of the paper.  Draw a line from A to B (Line C).  Don't cross B.  Repeat on all sides then move the measure in to draw more lines parrell to the C line.  And again.  You end up with 3 C lines on each side, joined at A and seperated at B.  That sounds complex but it's really easy.  Mad Scientist jumping up and down and rubbing hands together with joy.  Cut from A along C to B.  This gives a nice sharp corner at A, which will be visable.  It doesn't matter if you over cut a little at B or if the knife wanders a little along the C line.  It won't show once we fold it up.  USE PENCIL so you can rub it out. 


Here's what a cut piece looks like before and after folding.  You need six of these.  The Chatsworth papers have a white core so I have inked all the cut edges with VersaMagic Jumbo Java chalk.  As long as the white edges were covered it didn't matter if there was a bit extra here and there.  All adds to the look.  I also worked each of the cut areas between my thumb and fingers to stretch the paper a bit in the direction I wanted to fold them.   You can also see some of the moths and dragonflies I have cut using the dies.  


I put the six folded sections together to make my snowflake using three of the six different papers for this.  I love that these papers are of a collage style.  Each side offers a variety of patterns and shades.  If I was doing this again with these papers I would probably make each section at least 20cm square as they were quite rigid and I had a few sticky moments trying to balance the tension once I put them together.  At one point I thought I would be sharing a hat or a fruit bowl but after a little tweaking and twiddling.........  


I've used all the different design papers to cut the moths, dragonflies and for stamping the sentiment.  The moth and sentiment are from PaperArtsy USNT4.  The dragonflies are stamped with modern girl from LPC022 and stuck to both sides of three layers of die cut cardboard.   The sentiment was mounted both sides on PA heavy greyboard.  The chain was from a PA monster box.  


Here's the whole project.  Incidently if you use 15cm (6inch) papers your 'snowflake' will be about 40cm (16 inch) from point to point.  20cm (8 inch) papers give a whopping 50cm (20inch) from point to point.  If anyone tries 30cm (12inch) papers I would be very interested to know what size monster construction you achieve.  

Thanks to PaperArtsy for giving me this opportunity and thanks to you all for looking and reading.  Hope you liked it.  Do drop over to the PaperArtsy blog and check out the other creations that are being posted every evening.

Thanks for dropping by.  Hugs

Friday, 3 January 2014

Every Girl Needs Butterflies

Hello.  Welcome.  I would like to wish you a very Happy New Year and all good things in 2014.  Have you made resolutions?  A new year ahead and it's a good time to address the things that we have been putting off, or start something new, or both.  I have decided to use more of the scraps, to try and tidy up as I go along and get more organised.  Nothing major.  Just a few things which should be very do-able and will make my life easier.   We shall see.......

The Prima doll stamps have been around a while and the more I see them used on beautiful projects the more intrigued I become.  So just before Christmas I treated myself to one or three and here's my first project using the ball-gown doll stamp.  These are lovely but BIG.  I was thinking I might have to invest in a huge acrylic block when the cutting plate of my bigshot caught my eye.  Perfect!!


I wanted to make a thank you card for a young woman, although I may frame this as it's a big card, 7" x 9" in old money.  The colour scheme is courtesy of the December colour challenge at A Sprinkle of Imagination where we need to used at least 3 colours from ebony, mauve, peony purple, golden rod and rich orange.  I wanted to paper piece the skirt so I selected a variety of papers from the scraps and stash that I thought matched the palette.  Some I added stamping too for a bit extra interest.  Others are as found.   The orange base is a sheet of Making Memories Spook Street paper.  I embossed some mauve paper using Cheery Lynn Designs Diamond and Starburst embossing plate then highlighted with DI Dusty Concord.  The oval frame is Cheery Lynn Designs The Emperor's Swan die.  One day I'll use the swan but this frame is just so gorgeous by itself and it fitted perfectly here.


I have used my mauve Wink of Stella brush on the bodice and her hair band.  So pleased this photo caught the glitter effect.  I used Distress Stickles Black Soot for her hair. 


A close up of the skirt.


The sentiment is a Hero Arts stamp.  The butterflies were cut using Cheery Lynn Mini Dimensional Butterflies die. 

My lovely lady is joining the fun at
A Sprinkle of Imagination - December Colour Challenge
Cheery Lynn Designs Challenge 113 - Thank You
A Blog Named Hero Challenge 35 - 1 and 4 one lady, four butterflies
Simon Says Stamp Wednesday Challenge - New Beginnings Prima doll stamp is new 
Bunny Zoe's Crafts - Our Last Challenge of 2013 Wings

Thanks for stopping by.  I hope Santa brought you lots of lovely new stash and I wish you happy crafting. 

Sunday, 24 November 2013

Stamp Stamp

Hello and welcome to my little crafty corner.  I'm running a bit late today after my man needed a little help this morning.  So a very quick post cos it's almost closing time over at PaperArtsy.  Darcy made wrapping paper.  I thought great idea.


I started with a sheet of handmade paper from IKEA and stamped with DI Dusty Concord using the large stamp from LPC003

I filled in using DI Barn Door and the script , hat and crown stamps from LPC003.  Love that hat.....


A pretty package with some wool to wrap and one of the cute tags I made for Darcy's challenge last week.  Incidentally this tag was made using a blend of Fresco finish paints which Liz has demonstrated so well this week.  Will definitely be doing more painty mixes in the future.....

Joining the fun at

PaperArtsy

Thanks for dropping by.  Back soon to share more crafty fun with you

Thursday, 31 October 2013

More Than Hectic

Hello.  Welcome.  I promised you the winners of my candy today but you wouldn't believe the day I've had.  One of those nothing goes right days.  A big pity because today is the day, my actual blogaversary and there has been so little time for crafting!!  Typical.  So there will be a slight delay, hope to have it all sorted tomorrow.  As long as I can work out how to work Mr Random.........   How difficult can it be????


Just thought I'd share a card I made for my nephew.  I was wrapping presents and had some torn edges and thought hmmm...  So this is a blue base with some playing cards, ripped wrapping paper and some preprinted sentiments.  

Joining the fun at
Simon Says Stamp Monday Challenge- Anything Goes
Simon Says Stamp Wednesday Challenge - Anything Goes

Thanks for dropping by.  Hope to have happy news for you tomorrow.

Wednesday, 23 October 2013

Sometimes We Amaze Ourself

Hello.  Welcome.  Gosh, isn't the month just clipping along.  I have my annual harvest/thanksgiving/pumpkin party on Saturday.  Not really ready but I'm sure it will be alright on the night.  At least the pumpkin patch did it's bit this year.  Last year was a wash out.  This year my star of the show, named ED, cos when you put a light in him he becomes a shrunken 'ed, ha ha ROFL, sorry sad case humor.  Anyway, that wasn't a sentence, Ed is 21kg, that's about 44lb for those on the other side of the pond.  A respectable specimen.  The boys are going to be carving tomorrow and I am hoping for serious art.  Hmmmmm, does that count as 'altered art'????

Tonight I have a little something that is just so out of my comfort zone I think I must have been possesed.  Bwahahahahahahahahahaha.  Hope he or she pays a return visit because I am very pleased with my vintage effort.  I don't do vintage.  I like the style but it never turns out right for me.  I don't do lots of fluff and nonsense, but lo and behold plenty embellishment happening tonight.  Maybe it's just the fact that this one has been coming together over a few days so I've had time to add a little, take a bit away, add a little more.  Must try that more often.  Finding time!!  LOL


Over at Eclectic Paperie they have challenged us to alter a box.  I found these acrylic pillow boxes the other day when I was having a bit of a tidy so I thought I'd try to do something with it.  Ignore the lightning flash on the photo.  This is a clear acrylic box some embossing folders came in.


I covered my box with some handmade paper.  This is quite thick and soft with a lovely texture.   I stuck it to the box using double sided carpet tape.  Serious stick power.  Cheery Lynn's challenge is vintage.  Not a strong style for me but I thought I'd see how I got on.  Decided to go with neutral and brown colours.  This is where the fun of putting it together overtook the photo taking.  I started well......


Ta dah.....finished.  Sorry about that.  Lets see......  The music paper, the stars and the butterflies are 7 Gypsies Harmony double sided papers, available from EP.  I used three different papers but obviously they have a different pattern on the back!  Loved that when I cut the Cheery Lynn Mini Dimensional Butterflies cos it was like two for one, just turn them over for a totally different look.  So I ripped some on the 7G music paper and the darker brown strip is crunchy waxed paper from PaperArtsy that I stamped with the bottle stamp from LPC01.  Can't see much of that but trust me it's fab.  The string is some white kitchen string I coloured with Walnut Stain DI and then washed to get the right shade.  The image from LOTV Action Time art pad was ripped and matted onto another piece of that handmade paper, this time a pale brown colour.  The edges of all the papers and the box have been coloured with VersaMagic Gingerbread and Jumbo Java.


The Cheery Lynn Dreamcatcher #2 was cut from the brown handmade paper and tinted with the VersaMagic inks.  I added some seed beads.  These are the tiniest seed beads I have ever tried to work with.  There's more hole than bead!!  Definitely more fiddle than I would usually do but worth the effort I think.  


The stars look great but were so simple.  Dawny P had a wreath made with these today over at LOTV but gave the original link so check out the tut here.  I cut them using a Spellbinders stars die.  I added some copper rings from Korthobby which are supposed to be necklace locks but they looked good here soooooo........


I think that's everything.  I think this will make a great gift box for a boy.  It's not so big but I think some chocolate and maybe a gift card would fit in there great for a lovely birthday present.  Please let me know what you think. 

My altered box is joining the fun at
Cheery Lynn Designs Challenge 103 - Vintage
Eclectic Paperie October Get Altered Challenge - Alter a Box
LOTV - Anything Goes
Korthobby Oktober Utfordringen - Til en Mann
Hjerteboden Utfordring 10 - Bingo charm, bursday, 3 mønster ark, 

Thanks for dropping by.  Leave me a little love.  A comment gives you a chance at this candy

Saturday, 31 August 2013

The Whole Point of Patchwork is......

Greetings and welcome to the last day of August 2013.  Wow, where did that go.  Oh gosh, where did it go.  This might not get posted til tomorrow cos tomorrow is almost here!  So welcome to the first day of September 2013.   I've had an intensive craft session this evening which involved the Sewing Machine.  I think I shall henceforth call it the Scary Monster.  Anyway, we seemed to be on the same page tonight. 

Over at PaperArtsy it's Darcy week and she did just so many cool projects.  Tonight I'm trying out the patchwork project.


I started here, but decided after playing for a while that three sheets was too much for my resources.


So I combined my colours on one sheet and after doing what Darcy said got this


The Scary Monster seemed to like the project and we got to this


Some stamping, some doodling and we got this

As well as the Scary Monster I used various masks from Tando Creative, PaperArtsy fresco finish paints and stamps from LPC001, LPC022, MN16, SM12, Winter Wonderland Plate 6 and maybe more.....

Joining the fun at
PaperArtsy
Craft-room Challenge - Something New so much new here you wouldn't believe!  Technique, stamps and mask I never used, the Scary Monster behaved, now there's something really new!!
Simon Says Stamp Wednesday Challenge - Anything Goes

Thanks for dropping by.  I just need to think what to do with this fabby background.  It almost seems a pity to cut it up!  Take care, be crafty

I was one of the Top 3

Wednesday, 31 July 2013

For the Love of Pink

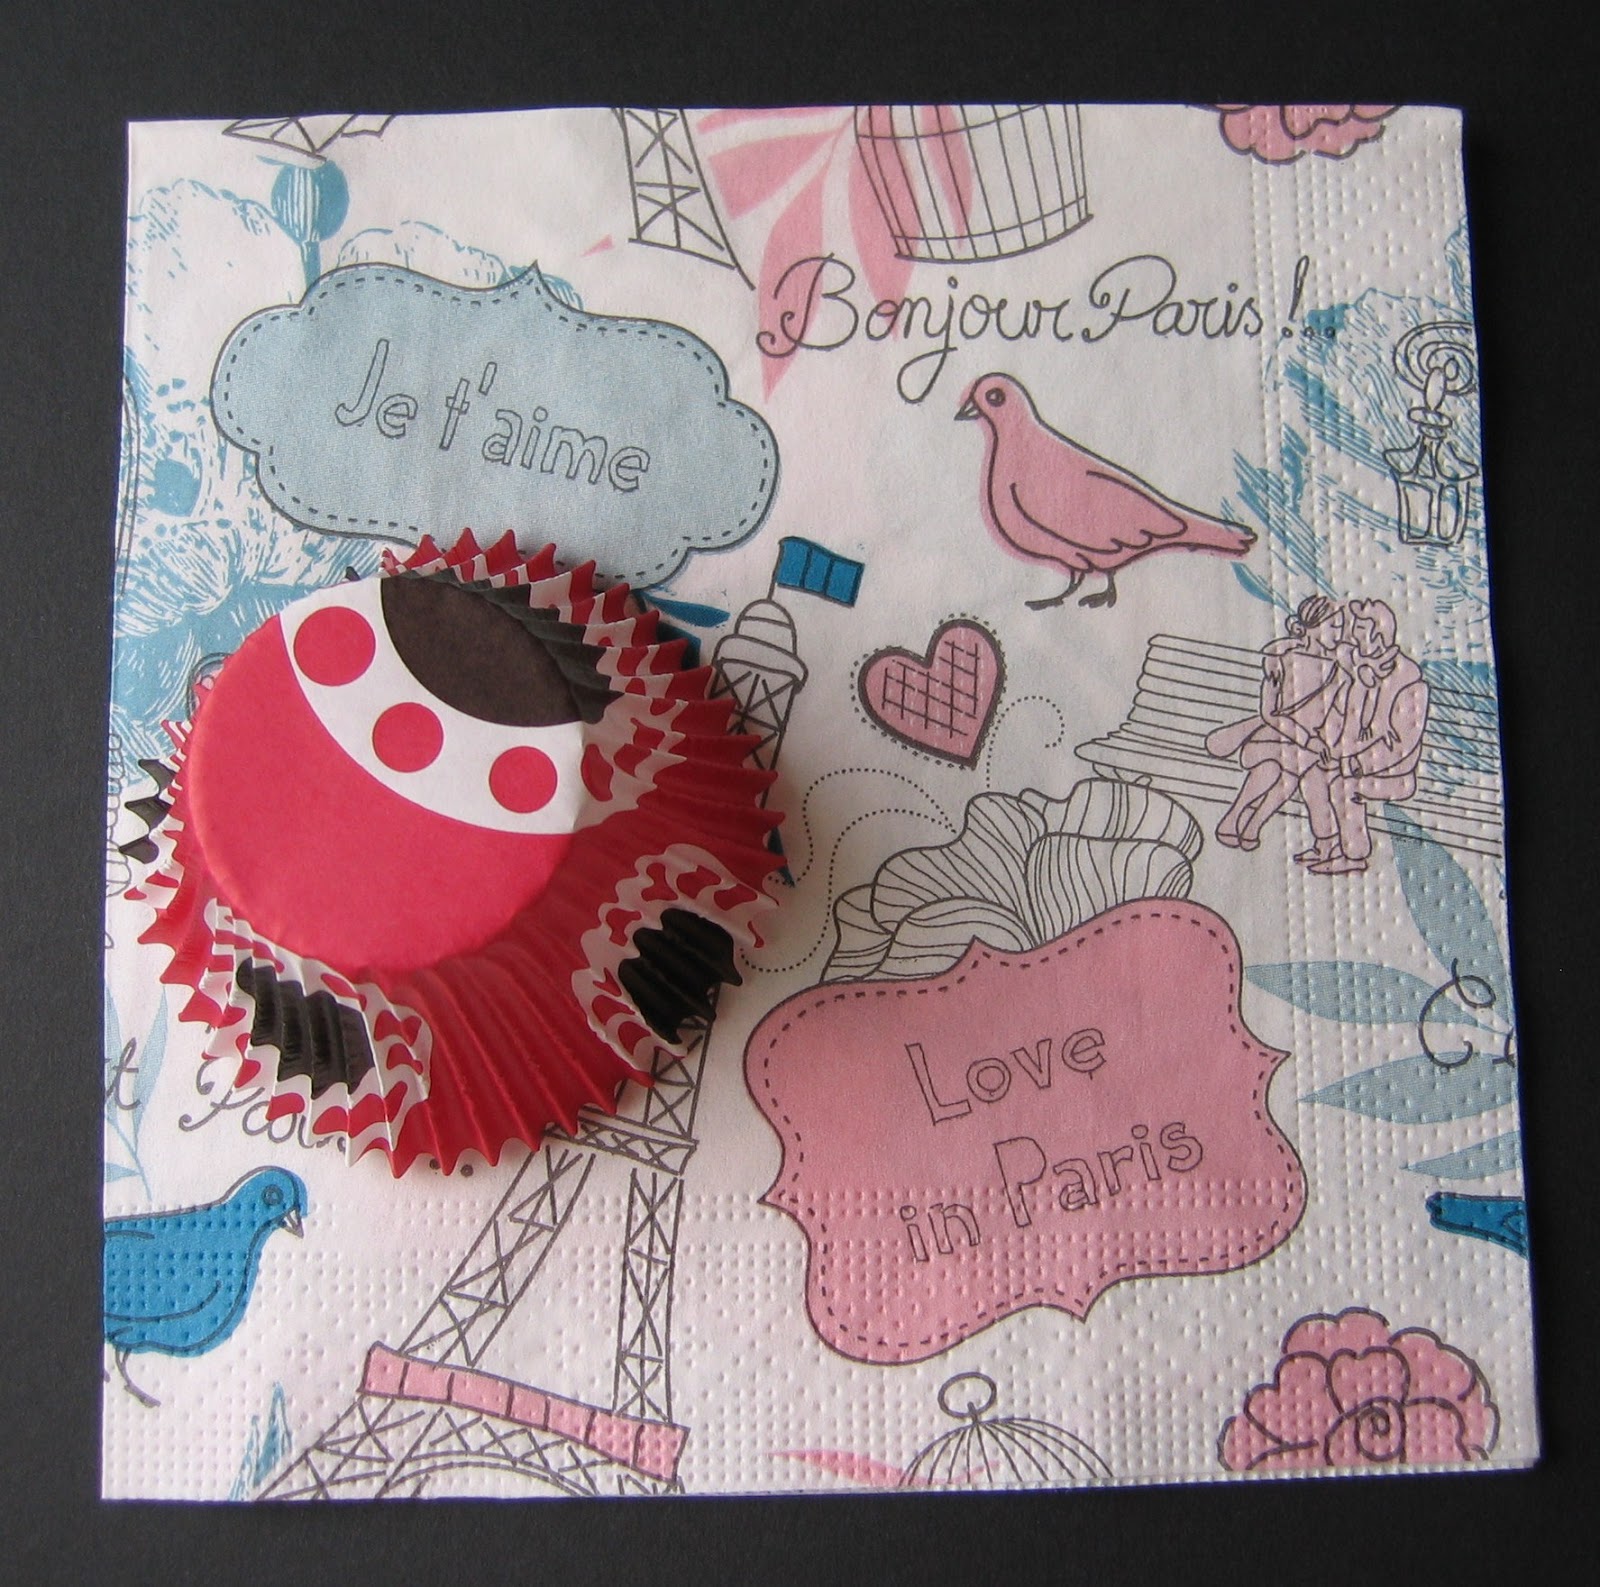
Hi blog followers and friends.  Welcome to my little bit of blogland on this, the last day of July.  Where is the year going??  Zooommmm.....   It has been too long since my last post.  Not quite sure what happened there because there are a lot of projects I'm working on but I don't seem to have got things finished and posted.  6/10, must try harder.  Anyway, something finally came together and it's for the LOTV and Eclectic Paperie challenges.  Now I have been wanting to join in with the EP challenges for a while because they have such lovely themes but this is the first time I have got it together. Over at LOTV it's pretty in pink and Eclectic Paperie wanted us to make a collage using paper from the kitchen!!   The first thing that came to mind was kitchen roll but after a little hunt through the drawers I found these two contenders.  


I have a few lonely napkins left over from when the pack is almost finished.  This one is Paris themed and pink so ideal for the LOTV challenge.  The other item is a cupcake case from IKEA.  They do some funky colours and although it had never occurred to me to use them for art it worked out quite well.  I can see a collection of funky cupcake cases joining the stash....


So I split the three layers of my napkin, glued it to pink cardstock to get a pink tint and added this lovely pair of young and in loves.  These have been cut from LOTV True Love art pad and mounted on sticky pads.  Such a cute pair.  


I cut the cupcake case into strips and made a double rosette.  I added a Papermania pink ribbon brad and an organza bow.  The hearts are from Tando Creative Hearts Minis that I coloured using Pebeo English Red Fantasy Prisme.  


Joining the fun at
LOTV Challenge - Pretty in Pink
Eclectic Paperie - Use Kitchen Paper  

Thanks for dropping by.  Have a great day. 

Tuesday, 19 February 2013

It Was a Lovely Sunny Day......

Hello Nomad friends, followers and passers by.  It really was a lovely sunny day today.  Very springy.  The ice was melting nicely but with the ground still frozen that gave rise to lots of puddles.  So I decided to let the silly birds out of their wet garden into the big wide world.  The big wide world is wet as well but there is more of it and much more fun for them.  Then I spent about an hour sitting in the sun watching the chickens doing their thing.  It was a bit decadent.  I rarely just sit.  Always so much to do.  As I was sitting there I kept thinking of things I should be doing but it has been so long since such a day has presented itself I decided I owed it to myself, and my vitamin D levels, to take the time to just relax and enjoy.  Bliss and delight. 

Here's a picture of my cockerel Ninja and some of his girls.....


What do you mean you dropped in for the crafting?!!  Well OK then.  After relaxing we must do a little work.  

I've been making ............ Christmas cards.  Yeah.  Over at Creative Craft World they have this idea that if we make a card or two every month then we will have a little stash ready for the big day.   Well, it's so nice someone wants to help me get organised so count me in.  

I designed a snowman.  The snowman was fussy cut  from hammered card and the nose, eyes, scarf and hat from various papers and card.  I think this hat is coconut paper.  Great texture.   I mounted the snowman on blue card and added some snowflake confetti. 


So pleased with my creativity I made another with slightly different papers...


Usually I make editions of one but I made an exception here.  So that's my snow pair.  Off to a start.  Not a huge start but a start.  


Want to join the fun?  Beat the Christmas Rush

Hope you have had a great day.  Thanks for dropping by.  Merry Merry Ho Ho Ho

Thursday, 20 December 2012

Inspired Gardening

Hi everyone.  Me again. Well, of course it's me!  Glad you dropped by.  Not many days left now until the big day.  For some people that's Christmas, for others it's the end of the world!!  Personally I have  planned my vegetable patch for next year so if the end of the Mayan Calendar does indeed signify the end of the world then I shall be very disappointed.    I have big plans for salsify and quinoa.   The Mayans would approve of quinoa.


I've had a productive afternoon and managed to finish another project that I want to submit to the Kortglede challenge.  This closes in an hour or so so must blog fast. 

A folder made of paper......

Inside a set of notelets


I used an A3 piece of patterned card which I folded in half and then folded in 5cm at each end.  The card was white on the back so I added an insert of handmade paper.   I spritzed the front with Tsukineko silver shimmer spritz and added a tag stamped with K-3117 from The Montage Collection.  I used Sizzix embosslit spiral and a brad and then attatched a silver loop to hold it closed.  I made a set of 6 notelets using Born to Shop Green Goddess embossing folder.  I coloured them using a wide variety of ink pads.  Whatever came to hand and looked good.  Quite pleased with the result.  Here's some better views of the notelets......


So this is my gift made of paper.  No chocolate in sight!


Take care, thanks for visiting.  All comments gratefully received.  


Wednesday, 19 December 2012

Lily T. Elephant packs her trunk and wonders what sort of jungle is this?

Hello hello.  Greetings, velkommen, nice of you to drop by.  I'm playing catch up with The Craft Barn Calendar Challenge where Izzy has already posted the final weeks challenge, but this is my week 10 tab.  Nothing forgotten, I've just been a bit slow with this one.   Hopefully it is worth the wait.  What do you mean you weren't waiting!  Just me then.  I have wheeled out a few of my trusty friends to help with the theme - Trees. 


I wanted to use my Sizzix original tree die so was looking for a green/leafy background and found this paper in my stash.  Haven't got any details on it but it's banana leaves with rain drops printed on it.  Amazing, and it photographed quite well too!  So I cut two scalloped hearts (Sizzix framelit die) from the background paper and two trees from various handmade papers.  The elephant is also a Sizzix original cut from Soesterens Grene lily leaf paper.  I did some detailing with a black pen and added a googly eye.  That's May.  Elephants in the jungle.  Of course.   

Entering for The Craft Barn Calendar Challenge Week 10 - Trees

Be safe, be warm, be happy but most of all leave Lily a comment cos she's feeling a bit lonely.  Maybe there's a friend just around the next tree.  A stranger is just a friend you haven't met yet. 

Saturday, 15 December 2012

Just snow you know

Wednesday it snowed all day.  It was snowing when we got up and when we went to bed and all the hours between.  Lots of snow.  I've lost one of my free ranger rabbits.  I hope she is just hiding under all the snow and hasn't taken advantage of the fact that the top of the fence is not as far away as usual.  I'm sure if she has made a break for freedom she will find plenty to eat.  Unfortunately, there are also more things which might take the chance to eat her.  Here's hoping she has been a sensible rabbit and made herself a cosy place under the snow.   

This week at The Craft Barn the calendar challenge theme is circles.  That's nice and easy.  I just need to think of some round things for my heart shaped world.  

 
I wanted something bright.  Luckily I have Sizzix Framelit circle set so I selected four handmade papers in bright colours and cut two sizes of circles.  Then I stuck them down so they overlapped to give the background.  Then I wanted some round sentiments to fit in with the circles.  Searched the stash and found..... nothing!  Had some very nice fish for tea.  Checked out a few blogs.  Played some cards.  Ohh, inspiration.  Have Word, can print.  DIY embelies.  Sometimes I think we are too dependant on popping to the shop for that perfect something.  So I printed the sentiments I wanted in a suitably roundish font onto some cardstock and then cut them with the framelits set.  A couple of butterflies cut using Cheery Lynns mini butterfly set, the calendar tab and another month closer to complete. 

So this is my entry for The Craft Barn Calendar Challenge Week 11 - Circles

I've got one week that I need to catch up on and Izzy will be giving the final challenge on Sunday and the 2012 calendar will be complete.  Hurrah.  It seemed such a big idea, twelve projects, twelve weeks, but almost done now.  Time flies.  

Take care, thanks for dropping by.  If you have time please leave a comment.  Your kind words are marshmallows in my hot chocolate.   
 

Saturday, 17 November 2012

Something Fishy

Hello everyone and here I am creeping in under the wire to join the Crafty Emblies challenge.  If you are a regular to my little blog spot you may soon realise that I am a last minute sort of person.  Maybe my middle name should have been Procrastination!   It's just there is so much to do.  Prioritise, prioritise.   Anyway here it is......


I have used a mirror frame from IKEA and glass to mosaic the fish onto the mirror.  The fish is coloured glass with two beads making the eye and the water is semi-translucent blue mosaic tiles.  I kept the mirror in place because it reflects light back through the glass thereby giving a backlit effect.  If it wasn't there I expect the fish would be too dark to see any detail.  I have covered the outside of the frame with some handmade paper with I tore by hand to give a softer effect around the fish.  I added some swirls of gold-green handmade paper cut with a Sizzix die.  The frame is then mounted on a canvas which I painted with green acrylic and then dry brushed with blue acrylic.  This was todays happy accident.  I had prepared this for another project and have been using it as a background for photographs but when I put the fish frame on it it added to the overall roundness of it all so I added it into the project.


Wish me luck as you wave me goodbye...