Tuesday 31 December 2013

Starry Starry Night

Hello.  Welcome.   It's the last day of 2013.  Gosh, time to look back, time to look forward.  New opportunities, new chances, new ideas, new inspiration.  I hope that 2014 brings you all the good things.

Over at PaperArtsy Leandra is seeing the year out with a bang.  The projects are coming thick and fast.  The video tutorials are great and the techniques fabulous.  Pop over and check out Christmas Cracker #2 for more info on this technique.   

I coloured my texture paste with Pea Coat.  Uhhhh, no that's right, just Pea Coat.  I've used 4 shades of Pea Coat.  I didn't have grunge paste so I used modellers pasta which is grey and quite grainy but it is designed to be coloured with paints so that where I started.  I coloured a portion with a drop of Pea Coat, then another portion with two drops, then three, then more.  Very pleased with the difference in the shade with so little fresco finish paint.  Fab product. 


My canvas with my applied coloured texture paste.  I am still debating whether I am brave enough to add a wash and whether it should be paler or darker.  I textured using stamps from Eclectica 04, a palette knife and a damp paintbrush.  I had a bit of my final mix left so added some dots on one of the palest panels.  Just to see.  After all this is an adventure into the new.........


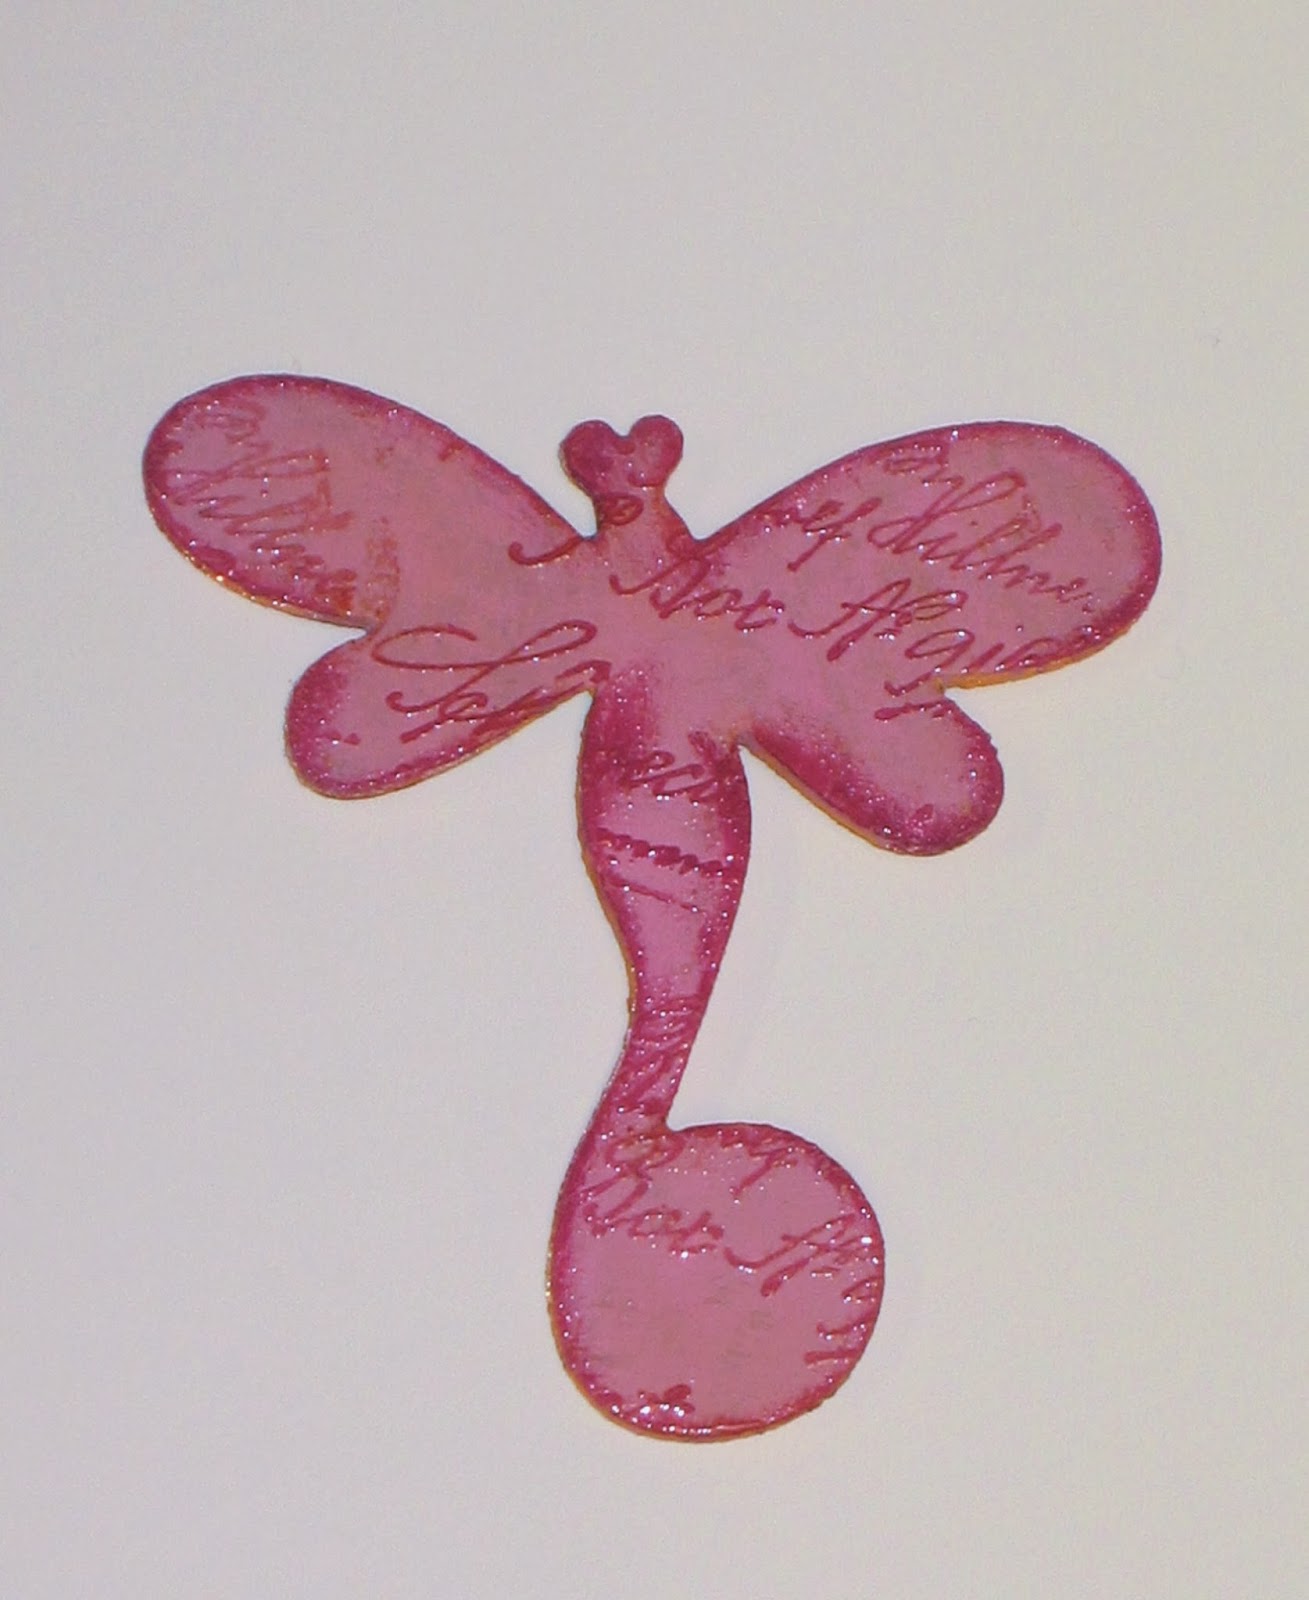
I stamped an image from LPC022.  This is a second generation image.  I liked the slightly faded look.  Fussy cut and added to my fab background.

Joining the fun at
PaperArtsy - Christmas Cracker Video #2 Abstract Canvas Prep
Loves Rubberstamps Challenge 83 - Holiday Blitz Anything Goes

Thanks for dropping by.  Hope you have a safe, happy New Year's Eve celebration. 

Monday 30 December 2013

Off to Grandma's

Hello.  Welcome.  Just a quick little post to share a Christmassy ATC.  It's a time warp.  


 I cut my ATC from white card and embossed with Cuttlebug Snowflake embossing folder.  I tinted with VersaMagic Aegean Blue and added a strip of Imaginations Crafts Teal Sparkle Medium.  Then I fussy cut the little ice skater from LOTV Winter Wonderland Art Pad and mounted her on foam pads.

My ATC is joining the fun at
LOTV Challenge - Anything But a Card
Wicked Wednesday ATC Challenge 116 - Happy Holidays
Imagination Crafts Challenge 6 - Merry Christmas
Simon Says Stamp Wednesday Challenge - Bling it on
Country View Challenges - Bah, humbug!
hristmas Blog Challenge - Fashion Challenge 

Thanks for dropping by.  Back soon. 

Sunday 29 December 2013

If You Want to Change Something in Your Life, You Have to Change Something in Your LIfe

Hello.  Welcome.  A bit early for philosophy?  Maybe.  The imminent New Year causes us to reflect on things past and things to come.  What do I want, where do I want to be.  Maybe I'm lucky and am where I want and should be.  Definately worth taking a little time to consider.  

Playing along with Jo Myhill again over at PaperArtsy.  Loved all of her projects this week.  Not time to do all but thought I try some elements from her first post 


I started stamping various images from PA Asian 2 plate onto tissue then stuck it to my base kraft card.  Too white.....


Some DI Vintage Photo and we are good to go.  Looking very distressed.  May have to stick it under a heavy book.  


I made my center panel with ripped card, an old bit of book (Legends of the Norsk Gods) and a stamp from LPC003


I haven't got moths so I went with the dragonfly again cut from three layers of card.  I used a stamp from LPC001 and clear UTEE


Man card!  Excellent.  Just in time for a spring birthday of one of my nearest and dearest.  Can't say too much, you never know who might drop by!!  I only used 4 colours on this project, DI Vintage Photo and Walnut Stain and VersaMagic Gingerbread and Jumbo Java. 

Joining the fun at
PaperArtsy
Stampotique Designers Challenge 128 - Anything Goes
The Artistic Stamper Creative Team December Challenge - Anything Goes
WOW Embossing Powder Challenge - Family a card for my sibling
Bunny Zoe's Crafts- Our Last Challenge of 2013 Wings 
That Craft Place - The Last Challenge for 2013 Anything Goes 
Loves Rubberstamps Challenge 83 - Holiday Blitz Anything Goes 

Thanks for dropping by.  Have a great Sunday

Saturday 28 December 2013

Abbey Road Stomp

Hello.  Welcome.  Well, here we are again.  I was working on this yesterday but ran out of day.  So it seems to go.  Soon another year will be over.  Here's hoping 2014 bring us all the good things.

I'm working on the December sketch for the Die-Namites dare.   I have been wanting to try a new technique and thought this would be a good opportunity. 


I've used My Minds Eye Abbey Road papers.  The blue card base is Stomp "Watch Out" Lizard Eggs paper and the Tag is Stomp "Brothers" Dinosaur Dots paper.  I just love those names!!  The dots paper had a fancy edge which I have taken advantage of.  


This is so cool.  I have seen this a few places and wanted to give it a go.  Die cut your image from the same paper as the background to give an embossed effect.  Love this.  I cut Die-Namites Spring Branch twice from the Lizard Eggs paper.  Where it crosses the dots paper I thought it needed  something extra so I masked and inked the center area with VersaMagic Aegean Blue.  This is such a lovely delicate die cut.  It looks gorgeous used in this manner. 


I added some Making Memories brads and some twine I dyed with DI Vintage photo.  The chipboard was coloured with VersaMagic Aegean Blue and ColorBox Alabaster chalk and then I used Imagination Crafts Jade Sparkle Medium on the edge.  The Gratulerer (congratulations in Norwegian) sentiment is a gold sticker.  


My card is joining the fun at

Thanks for your visit.   Back soon.....

Friday 27 December 2013

Having an Ohhh! Moment

Hello.  Welcome.  There you are.  How's things?  Recovered from the turkey/pork/beef/goose/nut-loaf overload?  I love that aspect of Christmas.  Oh, not the eating til you can't move.  Just the food.  All the special little extras and the snacks and treats that we just don't bother with most of the year.  The social aspect of preparing a fantastic meal and enjoying it with family and friends.  That rates right up there as one of my favourite things to do. 

Have been housebound again today.  Yesterday was dry and sunny.  Now that's a rare thing!  I was out in the garden pottering around.  I let the chickens out and they had a great time.  I cleared some pots from the greenhouse and dumped all the nice dry soil in a pile.  Oh, chicken bliss!  Bath time.  It's amazing how fast they seized the opportunity.   Alas today is grey and very wet with occasional hail.  Big sigh.  At least it's not cold.  Be thankful and take the chance to craft.  There are a couple of challenges I decided to concentrate on today so I having been doing a bit of one and then a bit of the other.  Here's the first to the post......


Over at PaperArtsy I was really taken by Jo Myhill's third project this week.   I loved how she used the tags and the bird so I grabbed some tags and dry brushed some Fresco Finish Rose onto them.  These were thick handmade paper, the stuff that feels a bit soft and felty, so they had some interesting texture.  Not sure about other colours so I moved on to the next element. 


I decided to used my PaperArtsy Dragonfly die.  I cut 6 layers, glued them together, painted with a base of Butternut then added some Pansy and Rose.  It was a bit muddy so I stippled on some more Rose.  Luverly.  I stamped the letter text from LPC003 in VersaMagic Perfect Plumeria and clear embossed.  Then I went around the edge with the same ink and clear embossed that as well.  Now I've got a lovely sturdy embellishment.  Then I started playing around with my tags and other bits and had an Oh! moment.  The dragonfly looked lovely on a single tag so that's what I ended up with.


I layered some lace, crunchy wax paper and some twine and then did some very childish cross-stitches.  I did think about getting Scary Monster out but felt the job might be a bit thick for him to cope with.  After a relaxing day didn't feel the need to be stressed by the antics of SM.


I added the dragonfly and some twine from a pack by Basic Grey called Urban Prairie.  A lovely mix of colours and fluffy nonsense. 


Love the dragonfly.  Also very pleased because I have decided when starting a project to go to the scrap boxes (yes, plural) and use from there first.  The card for the dragonfly and the other bits I stitched on were all scrapbox finds so I am a very happy bunny.  My motto for the new year is 'Use scraps, make space, buy stuff'  Hee hee.  

My tag is joining the fun at

Thanks for your visit.  Leave a comment so I know you was here.  Soon the New Year.....

Thursday 26 December 2013

Groovy Fantasy

Hello.  Welcome.  Well, that was Christmas!  Hope you had a good one.  Hope you are relaxed, recharged, restocked and have survived all food and snacks and cheer.  Were you lucky?  Did they listen when you asked for pretty papers, packs of cards, dies, ribbons, buttons and bells?  Or did you get socks?

Actually I did get socks.  Some very nice socks.  Christmas socks to go on joyful happy feet.  After all they are very useful.  But so are dies and papers.  Hee hee, I got some of those as well!  Happy dancing in Christmas socks.  I did cover my bets by ordering my own and they arrived Christmas eve.  Oh, happy day.    Build a flower dies from Cheery Lynn and as usual they are better than I was expecting.  My Big Shot hasn't ever been used so much.  I have been cutting petals, sepals, anthers, leaves in colours too many to mention.   I started slowly but now I have a myriad of strange and wonderful flowers.


I know, very groovy flowers.  I got a bit carried away trying out colour variations but this is for a friend who is having a bit of a hard time so I hope these bright crazy colours will bring a smile.  I used a steel blue base card and added a layer of Bazzill dots Grape Jelly.  I scrunched some burgundy tissue paper across the middle of the card to give texture and interest.  The flowers were cut from Basic Grey Nook and Pantry Rolling Pin paper using Cheery Lynn Build a Flower 1 dies.  I liked the crazy dots.  I used purple construction paper for the centres and mini silver brads.  The flourishes are cut using Sizzix Flowers and Vine #3 and the sentiment is an Art Impressions stamp.  


Hoping to bring a smile with my groovy happy flowers.  Joining the fun at

Thanks for dropping by.  Looking forward to seeing all your inspiring projects with your new goodies.  Take care, have fun, craft on.  Soon the New Year.......

Sunday 22 December 2013

Hearts Come Home For Christmas

Hello.  Welcome.  The wild weather kept me awake last night.  It seems to be following a pattern.  Grey and yuk during the day then the wind picks up in the evening by the early hours it's howling and the rain is hammering on the windows like it wants to come in for a coffee and a piece of cake.  Now I'm all for coffee and cake but really, trying to sleep here!

Over at PaperArtsy Liz has been wowing us all week and I wanted to have a go at the decorated book and then Leandra threw in the most gorgeous mixed media heart project.  Gosh and wow.  That's just what I need.  I can decorate some hearts. 


I started with a couple of wooden hearts


I started adding some chipboard wings and metal bits from Korthobby and also some bits I got in my PaperArtsy monster box this year.  I filled the metal circle with texture paste and added a butterfly that broke off a metal bookmark.  You know one of those all pretty colours and very glossy.  Not sure if it will take the paint....  Oops, photographer forgot to take photos here.  I painted it all white and tried a little stamping. Then I went a little mad.........


Yesterday I was having a tidy, hurrah, and found my Renaissance Liquid Leaf, another monster box goody, so I thought I'd give it a go.  Wow.  There's a few more things on these photo's.  The butterfly is in place, a Tando heart, some buttons.


Close up of the small heart.  I really like this one.  Festive. 


I need to change a few things as well I think.  The string has to be coloured.  It worked fine when I was planning a shabby white colour scheme but now it looks a bit poor relative.  Can I use Liquid Leaf on cotton?  Also I had prepared this bottle cap with a stamp from LPC001 and then filled in with glossy accents.  Since I had a sudden colour change I didn't have time to do a new one.  I think I need to re-do colouring the bottle cap with the liquid leaf and maybe stamping my lady in gold/copper/bronze.  Don't know if I have bronze ink.  Does it exist?


So that's my attempt at some mixed media with hearts.  Very difficult to get an angle on the photo where there isn't glare from something.  I haven't cropped or altered the colours because then I lost that precious effect of the Liquid Leaf.  Glad I tried it.  Will definitely be using it again. 

Off to join the fun at
PaperArtsy
That Craft Place Challenge - The Last Challenge for 2013
Bunny Zoe's Crafts - Our Last Challenge of 2013 Wings
Simon Says Stamp Wednesday Challenge - Bling it on
Tando Creative Challenges - Christmas Time Let's Sparkle

Thanks for dropping by.  Hope you are managing to relax on this last Sunday before Christmas.  Take care.  Glad you found time to visit.

Saturday 21 December 2013

Little Boxes, Little Boxes

Hello.  Welcome.  Big special hello to Jellybeanerz.  Welcome to the following.  Gosh, nearly Christmas.  Are you ready?  I just can't get my head around it.  The weather here in Southern Norway is unseasonable warm.  My hydrangea looks like it's going to start sprouting!!  We are all confused.  Not complaining mind.  There's still lots of time for the weather to get bad before Spring arrives.  But it just doesn't feel so much like Christmas.  

I decided to try this tea light card after seeing one similar on a blog post.  Sorry, don't remember where I was and there were no instructions, so I made it up as I went along.  If I had done a search I would probably have turned up a load of tutorials and saved myself some thinking.  Just in case anyone wants to give my version a go I remembered to take photo's LOL.....


I cut card from a sheet of My Mind's Eye 29t Street Market.  This is card weight paper and printed both sides which saves some effort with colouring.  I cut
  • 1 piece 15 x 26cm and scored at 12 and 14cm
  • 1 piece 15 x 15cm and scored at 1, 3, 12 and 14cm.  Put double sided tape along the two outer scored edges. 
  • 2 pieces 7 x 4cm scored at 1 and 3cm along the length.  These two pieces are to stop the tea lights falling out.  I have stuck one of these in place on the photo above. On one piece put tape along both edges, on the other piece just put the tape along one edge.  

I used a Sizzix Movers and Shapers die to cut the windows.  Then I folded under the edge with tape, lined it up against the hinge score and stuck it down. 


If you then push this tea light section back across the hinge and flat the other edge will be in the right place to stick it down.


Push it back up and it should look like this.


Tape the bottom piece (the one with tape both sides) in place. 


I've decorated the inside of my card using Cheery Lynn Emperor's Swan die to cut my oval frame.  The flourishes are cut using Cheery Lynn Celtic Oval Frame die.  I have glittered the frame and the flourishes.  I put my top piece in place to hold the tealights.  The back edge is glued but I punched two holes at the front and put a piece of ribbon through.  I have also attached a tag stamped using LOTV Madame tags set. 


On the front I cut a Cheery Lynn Waltzing Matilda Lace Doily from pale pink glitter card.  The cat is Joanna Sheen Cup Kitties decoupage.  I added a sparkly mini pompom to his hat, some glitter on the trees and holly and some more glittered flourishes. 

Joining the fun at
Cheery Lynn Designs Challenge 111 - Sparkle and Shine
Joanna Sheen Challenge - Make it Sparkle
Simon Says Stamp Wednesday Challenge - Bling it on
Papirdokkene Utfordring 54 - Dies
Papertake Weekly - Last Christmas Card of the Year
Country View Challenges - Bah, humbug!
Crafty Hazelnut's Christmas Challenge 156 - Last Minute Cards
Crafty Hazelnut's Christmas Challenge Extra for December
ALBC - Christmas Cheer

I really like these tea light cards.  A little bit more than a card and really great if you use scented tea lights.  Haven't quite worked out if they would be postable.  They are quite heavy and you would need to use a box-elope. 

Thanks for dropping by.  Take care, relax and don't forget to craft......

Wednesday 18 December 2013

Tutu Snow Queens

Hello and welcome.  Getting in some last minute Christmas cards.  I've been playing with my Art Impression stamp Dancers.  I don't know what it is about this stamp but it always gives me big ideas.  I always see my dancers on a roof in the moonlight, or in a snowy forest.  The one on the left looks like she should have a blue rinse, the one on the right is a blonde, the one in the front looks like a very efficient secretary with dark hair and the other one is a redhead.  I don't know why but this is how I see them.  These gals have attitude.....


I started by making a snowy background.  I used Hero Arts Stunning Snowflakes stamp and embossed them with pale blue embossing powder.  I cut three piece of white card and layered them to give me some snowy slopes.  I used VersaMagic Aegean Blue chalk ink along the edges and to add some shadows.


Here they are.  They have their Christmas tutu's on.  I stamped them twice and fussy cut them.  The secretary and the blond have been cut out a second time and mounted on foam pads.  The picture looks a bit flat but in the real it pops!    Oh, no forest, just a snowy scene.   And some crazy gals dancing in the snow just for the joy of it. 

Joining the fun at
Art Impressions - Making Spirits Bright
Stamping Sensations - Free and Easy
Simon Says Stamp Wednesday Challenge - Let it Snow
Simon Says Stamp Monday Challenge - Stamp Out 2013
Crafty Hazelnut's Christmas Challenge 155 - Whatever is Urgent
Crafty Hazelnut's Christmas Challenge Extra for December

Thanks for your visit.   Hope it's all merry and bright with you. 

Tuesday 17 December 2013

My Favourite From 2013

Hello.  Welcome.  This is just a quick post and it's to share with you my most favourite project I made in 2013.  This idea was proposed by Craft-room Challenge and The Artistic Stamper Creative Team.  I thought it was a great idea.  So here it is....


There are a number of reason why this is my favourite.  
  • I like the fact that I have finally used some of that plastic packaging that I keep and managed to turn it into a lovely and useful piece of art
  • This is so not my style!!  Is that vintage? or maybe shabby chic? what ever you want to call it it is so not me and I am really pleased I managed those great colours, layers and embellishments.  
  • Love those stars!
  • It's for a boy, or maybe from a boy?  I'm not always so great on male projects but this one works for me!  
Here's the original post if you want to check out some more details.  

Joining the fun at
Craft-room Challenge - Time for Favourites
The Artistic Stamper Creative Team - Highlight of Your Year - It's a Challenge 

Maybe you would like to share your favourite project or leave a little comment telling me what your favourite of my projects has been this year.  Thanks for dropping by.  Hope all your preparations for Christmas are going well.  Don't get too stressed.  After all another week and it will all be over.  OMG!!!

Sunday 15 December 2013

Hat Trick

Hello.  Welcome.  I have been thinking on this since seeing Jo's post over at PaperArtsy this week and then this morning I woke up and it was all in my head.  Why didn't I just go straight to The Hat in LPC003!  So I fed the rabbits and chickens and then noticed one of my hens was limping quite badly.  Badly enough she let me catch her.  OK, vetting comes before craft.  So now I'm right on the line again for the PaperArtsy challenge.  Nothing unusual there then....


I stamped the hat from LPC003 a few times on white card.  Then I coloured in a few til I was happy with my colour combos.  Quite a few!


I masked a card and sponged on Colour Box chalk Peach Pastel and then stamped a flourish from Crafty Individuals in VersaMagic Tea Leaves.  I wanted a pale background so my hats stood out.  Then I started arranging my hats and it just wasn't right until.....


Yep, flower pots.  Who would have thought!!  Cute eh?  I added a lilac paper flower to each.  The hats/pots are coloured with Sharpies with a little Wink of Stella in there as well.  You are right Kay, must get the clear.  My hats were inspired by Jo's elf. No really they were.

Joining the fun at
PaperArtsy
Stampotique Designers Challenge 128 - Week 2 of Anything Goes
The Artistic Stamper Creative Team Challenge - Anything Goes
Stamping Sensations December Challenge - Free and Easy

The sun is shining here so I'm off to play in the garden.  Have a great Sunday and thanks for dropping by.

Saturday 14 December 2013

Gone Fishin'

Hello.  Welcome.  I have really enjoyed making a selection of gift boxes the last few weeks.  Fun and useful art.  I loved the magic gift box and the easy folding technique for the lid and trays and wondered how big a box a 12 x 12 paper would make.  I'm bad with numbers so in the end I decided to fold one.  Then I was going to decorate it but along the way I got distracted, remembering I needed a birthday card,  so the gift box remains on half.  Instead tonights offering is a card for my nephew.  


Isn't that image adorable?  I found him on a sheet of paper from Do-crafts Wellington paper pack.  I have had these a while but only just had a proper look through.  These are lovely papers.  I wonder why they have been on my shelf so long!!  Must investigate other dusty areas of the stash.  Anyway,  I cut him out and ran a line of green glitter glue around the edge.  I did cut a frame from green glitter card but it wasn't right.  It does get used though......


I cut two Cheery Lynn Spring Flower Burst Doiles from Craft Creations green gold flower paper.  I know it looks very blue in the picture but it's the best I could do whilst keeping everything else close.  I mounted the image on one doily and cut the other one down so I had that nice shape from the center.  I cut an angel wing for the doily and a free hand cut for the cut down doily shape from a sheet of red from the Wellington paper pack.  The happy birthday is a Crafty Individuals stamp.  I cut fancy shape and added some DI and VersaMark ink shading.  


There's that green glitter frame.  I cut it in half and arranged it behind the doily cuts.  I layered it all on Basic Grey Curio Victoria paper and then on a dark green card base.  

My card joining the fun at
Cheery Lynn Design Challenge 110 - Red and Green
Basic Grey Challenges - Anything Goes


Hope my nephew likes it.  Take care.  Thanks for dropping by. 

Splish Splash Splosh

Hello.  Welcome.  Hope you have been having a lucky day.  I'm dancing.  And hopping.  Hops everywhere.  Hoping to be lucky, or at least inspired.  Isn't blogland great. 

The final 12 Days of Christmas challenge over at Swirlydoos was a giant tag.  OK, I can tag. 


I started by cutting my 20 x 10 tag from Basic Grey Jovial.  I bought this because it was such a lovely bright colour and I thought it would make great summer projects, until I noticed it had 'I saw three ships come sailing....' printed all over!  Ah well, maybe no one will notice.  Or I can just use it for a Christmas project.  My second layer is Do-crafts Chronology paper.  I inked round both layers with chalk ink.


I've used a Basic Grey chipboard bauble.  I covered it in crinkled tissue paper and painted it with gesso.  I added the gesso quite thick at the top to give it a snowy texture.  Then I sprayed it with Smooch Spritz Log Cabin.  Oops, that's a bit darker than I was expecting.  Lighten up, lighten up, lighten up.  Well, maybe a little bit and ooh sparkly bits.  I added some stickers for a bit of bling.  You all know by now that's Merry Christmas in Norwegian don't you..........


I added some lace behind the bauble and some fancy fibers from the bauble to the top and then added some more for the tie.  There's a lovely little star from Storyteller there as well, peeking out of the fluff.    

My giant tag joining the fun at


Swirlydoos 12 Days of Christmas - Day 12
Simon Says Stamp Monday Challenge - Tissue
Storyteller Utfordring 6 - Jul Eller Nyttår
Basic Grey Challenges 109 - Happy Christmas

Thanks for dropping by.  Hope your Christmas preparations are coming along nicely.  Take care, be crafty.......

Thursday 12 December 2013

It's Magic

Hello.  Welcome.  A special big and happy hello to Birgitta.  Welcome to my happy following.  I have been doing a little gardening today.  Not a lot, just a bit of tidying up.  A couple of the chickens snuck past me when I went in the pen this afternoon.  Then the rest were complaining because those few were out so I let them all out.  They went charging round the garden scratching up leaves and soil and generally having a great time.  Not much for them to destroy at this time of year.  All the snow of a few days ago has melted in our unseasonable weather.  10°C today.  Hey double figures, that's summer temperatures here in Norway.  Very strange.......  Getting dark early though so still time to come in and do a little crafting.  

Todays challenge at Swirlydoos was to make a magic gift box.  Now I think this was a significant project to tackle with the short deadline involved but after looking at the video I thought I'd give it a go.  I've never made one of these and although it did take some time it wasn't as much as I thought it would take. 


The link above gives the a link to the how to video.  For my trays I used Do-crafts Chronology papers.  For my box sides I used a double sided poinsettia paper from my stash.  The image on the inside flap is from LOTV Winter Wonderland  art pad.  


Here's my closed box.  The lid was also made from the Chronology paper.  I used some green satin ribbon for my bow, some white and silver cord with felt snowflakes.  Some silver beads and pearls.  I have edged all the papers with chalk ink.  


Here's a close up of the LOTV image.  I grounded her with some iridescent glitter glue but it doesn't show much in the photo.  


Open with the lid and the pretty dangles. 

My Magic Gift Box is joining the fun at
Swirlydoos
LOTV - Anything But a Card 
Hjerteboden Utfordring 12 - Jul Alt Annet Enn Kort 
That Craft Place Challenge - Christmas 
Papertake Weekly - Christmas Creatures 

Thanks for dropping by.  Hope to be back soon with more crafty fun.

Tuesday 10 December 2013

Saving the Trash

Hello.  Welcome.  Just wanted to share a little project I have been working on using My Mind's Eye products.  Over at Swirlydoos the day 9 challenge was to make a gift card holder.  Now I understand the point of these is to make that perhaps not so exciting present look a little bit more exciting.  I also think an important thing is to make it BIGGER.  A few years ago after a particularly frantic unpacking session I was putting out the trash.  While trying to stuff it all in the rubbish bags I spotted a tag that was very stiff.  I decided to check it out and it turned out someone had attached a gift card as a tag.  And it was on it's way to the rubbish bin!!  Needless to say I have decided when making my gift card holders I will make them A6 size so things don't get lost..........


I wanted this to have a masculine feel.  I started with a piece of MME 29th Street Market Carefree Cherish Lovely Lines/Very Violet double sided paper.  I love these because they are heavy enough to use as a card base.  I cut a piece 15 x 30 cm and scored at 10 and 21cm.  I used a Fiskars border punch on both ends, cut them off, turned them over and stuck them down on the two ends.   Another reason I love these papers, you can guarantee a great colour co-ordination between the front and the back.  Then I cut two snowflakes using Cheery Lynn Snowflake 2 die from MME Bright Together United Florals/Cool-ective Blue, again from 29th Street Market collection.  The buttons are Mischievous chipboard elements. 


Inside you can see the right hand panel which I glued down to make the gift card pocket.  I cut a fancy frame from another sheet of 29th Street Market using Crafts-Too Frames 7 die.  I did some faux stitching using my dark green Wink of Stella brush.  The sentiment is from MME Collectable chipboard shapes.  The little white half moons are velcro dots I cut in half to keep my gift card holder shut. 

Joining the fun at
My Minds Eye - Dear Santa
Die Cut Divas - Let's Celebrate
Artful Times Challenge 44 - Diecuts or Punches 

Thanks for dropping by.  Back soon with more craftiness......