Friday, 30 August 2013

Bring on The Clowns

Hello again blog friends, followers, happy hoppers.  So glad you could join me.  It's nearly the weekend and the end of the month so working hard to finish up some projects and get them posted.  Over at Altered Pages the challenge this month is Green.  What a great colour.  What a great idea.  Let's go green....

I started off by upcycling some wooden domino's I found in a charity shop.  It's the green thing to do ;-)  These places can be little treasure troves.  You never know what you will find.  I found these....


Hey 99p how can you go wrong?  Actually they are quite cute but I was thinking more the altered art possibilities......   So I sanded a few and painted them white, cos the cows were quite difficult to get rid of.  The rabbits went whoosh, but those cows were a bit persistent.   


Then I added the green collage background from Altered Pages Time Collage Backgrounds 1724D


Some patterned tape involving elements of green


Some clocks from the same Altered Pages collage sheet


Some dots of Pebeo Fantasy Prime in Emerald. 


A clown from Altered Pages Victorian Clown Collage Sheet 1153D.  I have to admit at this point that this is the second clown I used, and the second domino.  I took pictures of my first one but they were so blurred I decided to make another and try and get some better pictures second time around.  


Back to my first choice clown, because he was wearing green.  I wrapped my domino with copper tape.  This is called new wave I think.  It comes with one edge cut to a nice wave pattern so stained glass artists can look really fancy.  I bought this in the US many years ago and it wasn't available in the UK at that time.  Maybe it is now.  You have to love the bling.  I covered it all in glossy accents. 


I made a little chain of polished jade chips so he can dangle.  Very pleased.  As mentioned I made a second.  I managed, despite best efforts to get a couple of air bubbles in the glossy accents.  I pop them if I see them but these little blighters stayed hidden til it was too late.  Any tips gratefully received.   Is there another product out there anyone would like to recommend that gives a good glossy cover and is hard wearing.  I thought this would make a good key chain or dangle but don't know if the glossy accents will survive being in a pocket with keys etc.  Maybe I'll give it a test run.  I'm sure if it survives me it will do well anywhere.  

Here's my clownish pair.  What a great little gift.  I can see me making a small pile of these.  Must check out Altered Pages for some more fun collage images.  

Joining the fun at
Altered Pages - Green
Simon Says Stamp Monday Challenge -  Dotty
Craft-room Challenge - Something New this is the first time I have altered dominos
Simon Says Stamp Wednesday Challange - Anything Goes

Thanks for dropping by.  All comments  welcome and any tips on the glossy stuff gratefully received.  Have a great day. 

Thursday, 29 August 2013

I Choose You....

Greeting everyone.  Well it's almost the end of August.  Everyone is talking about the end of summer, autumn colours, Christmas.  Personally I am hoping for autumn to hold it's horses because things are just coming good in the garden and a cold snap would be very disheartening.  I am however going to address the Crazy Season.  It's Christmas card time!!    I have been creating for LOTV whose challenge is Festive, and of course this will be going towards my BtCR total.  A worthy addition to the Xmas card stash.....

This one was actually a bit more difficult than it looks.  I spent ages trying to decide if I should emboss, ink, frame, fancy cut or bling up the background.  In the end I opted for CAS.  


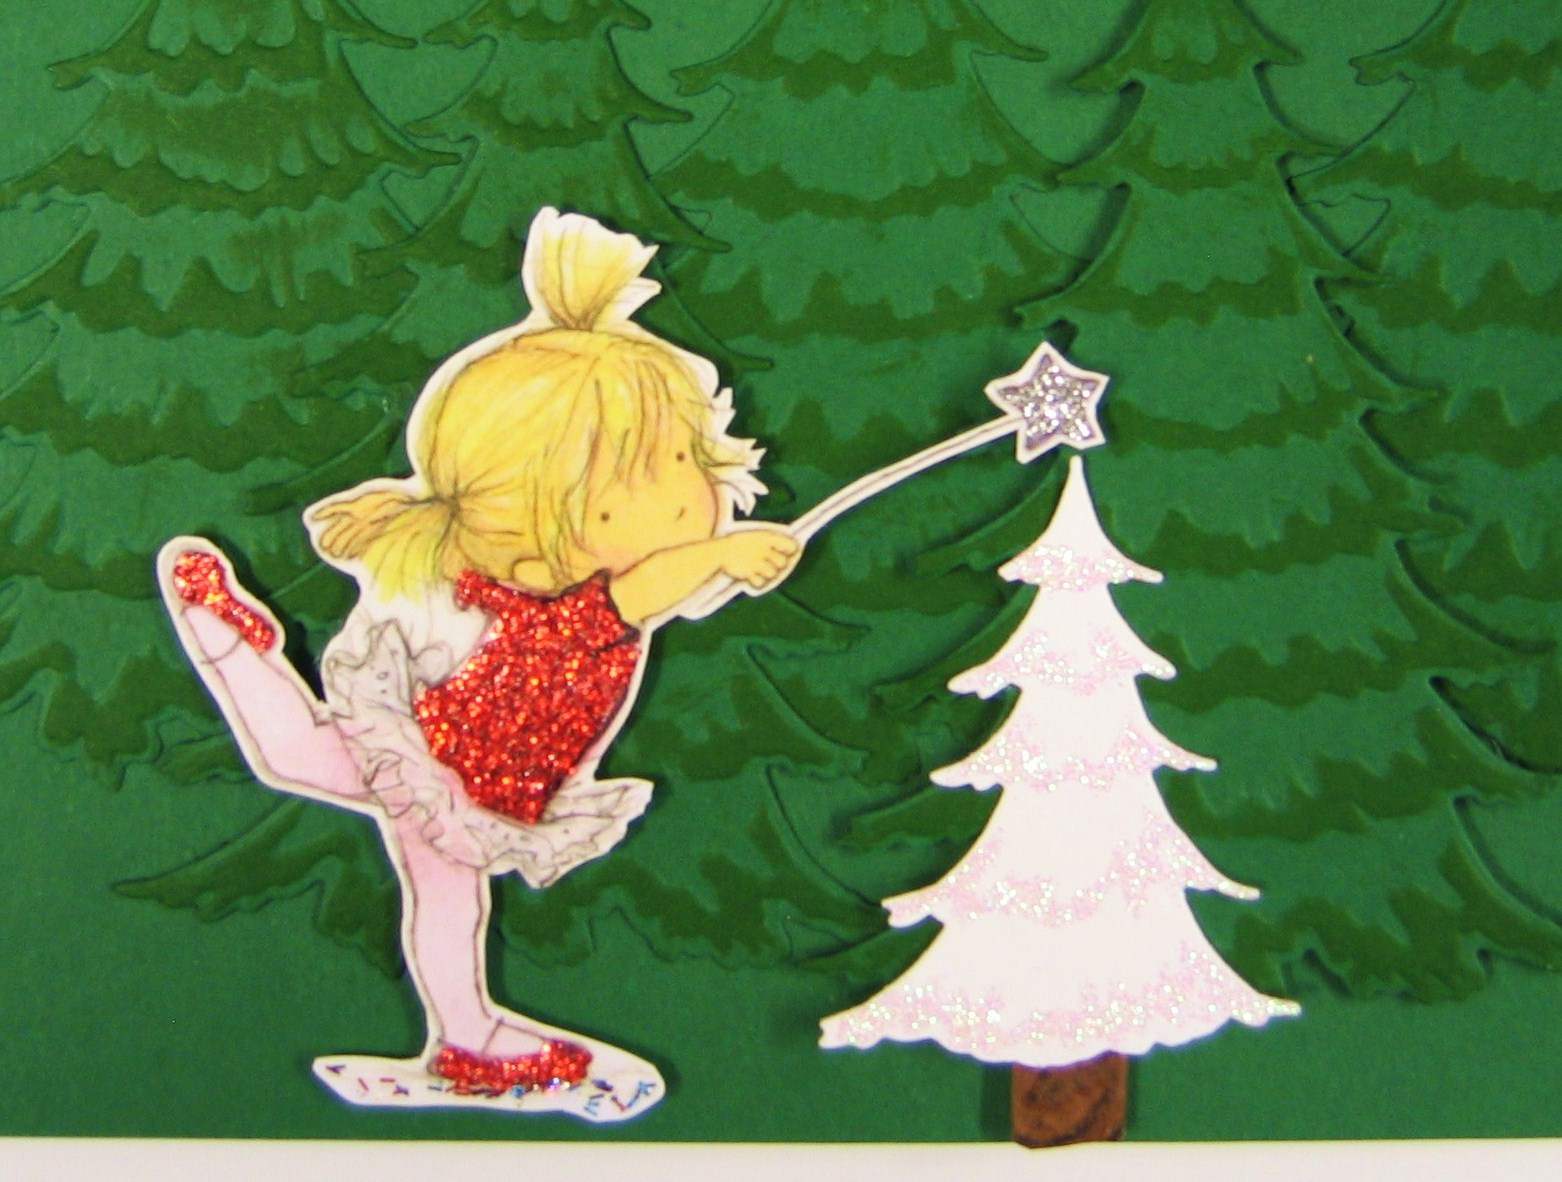
So I cut a whole stack of trees using Memory Box Frosted Christmas Tree die, embossed them and added some DI Mowed Lawn.  Then I stuck them on a plain card of the same card I used to cut the trees.  I realise they look stamped here but that really is three diecuts.  They do say you can't see the forest for the trees......


More trees, the one front right is on sticky pads.  Then I cut another from white card, added iridescent glitter on the embossed parts and cut off the top to make a small tree.  The little girl is from LOTV art pad Just for Girls and I have dressed her in a red glitter dress and slippers so she can go out in the forest and add a star to this special little tree.  


A close up.  Hopefully you can see the glitter a bit better.  Maybe not!!  Ah well

Joining the fun at
LOTV - Festive
Me and Mine - BtCR (total 24)
Simon Says Stamp Wednesday Challenge - Anything Goes
Craftyhazelnut's Christmas Challenge 139 - Cute 
Craftyhazelnut's Christmas Challenge Extra - August 

Thanks for dropping by.  Hope you are having a good week.  Soon the weekend......

Sunday, 25 August 2013

Old Photographs

Hi everyone.  So glad you could join me.  If you are expecting to be going down memory lane with me then you may be a little disappointed.  I have been playing with a technique that Carol Quance has been sharing over at the PaperArtsy blog and it reminded me of negative images, hence my misleading title.  But then again my titles are always a little quirky so maybe you weren't expecting anything but great art.  ROFL.  Ah, midnight humor strikes again.....

OK, so you have got to try this.  I have spent so long tweeking my photo's trying to get the true intensity of the colours I have totally missed a deadline over at Cheery Lynn.  Ah well, today is a new day.  All things are possible.  Carol has been stamping on black with the PaperArtsy fresco finish paints.  Now I resisted buying these for a while because I already had lots of different paints.  Duh, how stupid am I?  OK, maybe not stupid.  Maybe just weighing the purse against the existing stash.  These are really as great as everyone says and you really need to get these if you aren't already in the know. 


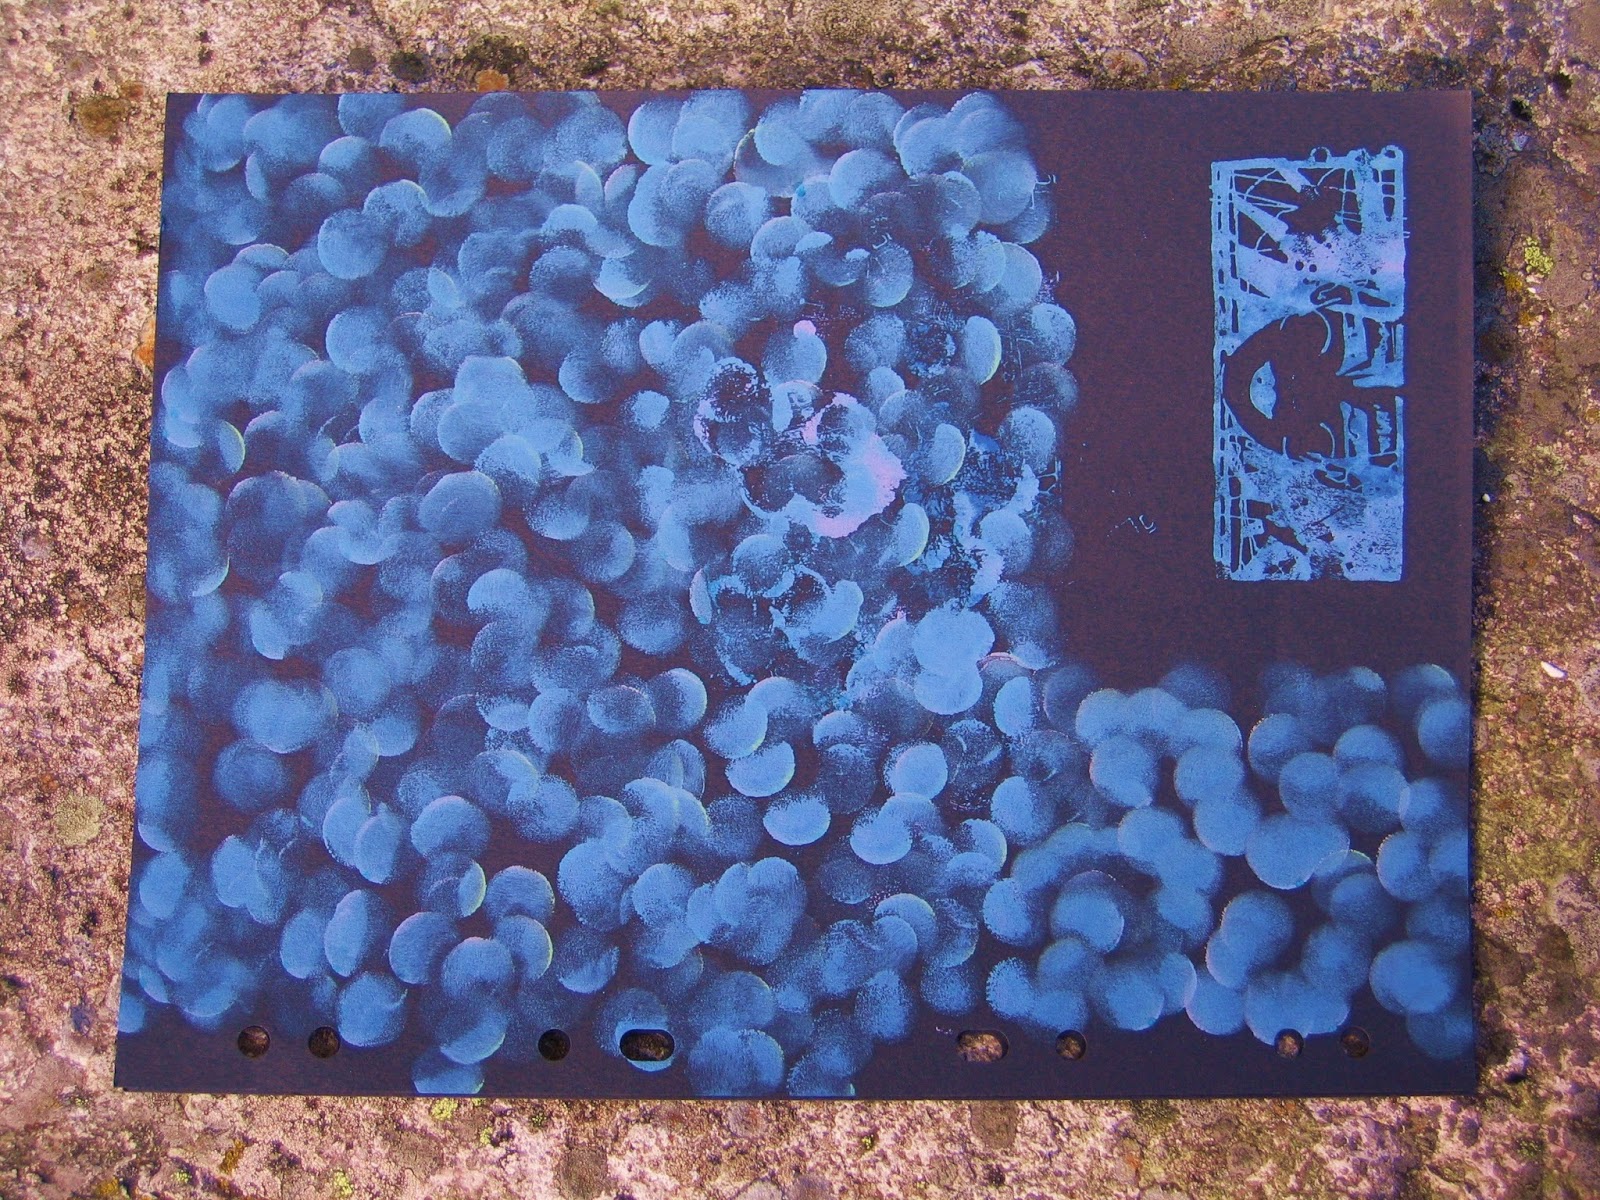
I just can't get the colours as wow as they are in the real but I hope you get the idea.  I have used my most favourite Modern Girl from the PaperArtsy LPC022 set.  Top left I started with fresco Pansy and Limelight.  Moved on to Inky Pool and Pansy then reversed them just to see.  Then introduced some Pea Coat.  The Pansy looks quite white in the photo's but it's the best I could do.  I applied my paint using a finger dauber.  I mention this because I had enough paint out for one more image which I stamped on a new black sheet.  Then I decided to clean the dauber on the sheet, rather than wash it which I usually do......

 
Look at all that paint!!  I could have washed it away and wasted it.  Instead I have a fabby background.  Very pleased with self.  OK, itching to do something with these fab images I have but what.......

Carol was using flowers and was putting them on a pale background.  At this point the Cheery Lynn challenge, the one I just missed, put in an idea.  I was supposed to be using doilies so I thought lets see where that takes me.  So I got this....

I've used an English Tea Party doily cut from mauve card which I then daubed with fresco Pansy.  Then I did some white dots with my galaxy marker.  I've mounted it on my happy accident background and added some faux stitching.  Then I mounted one of my images in the middle.  Then I decided I didn't like the faux stitches!!  Exasperated hands in the air.  Nothing for it, it must go!  So I ripped it off.   Gasp, horror.....

It's better I think.  I like the ragged black edge.  Good contrast.  See, totally different colours to the one above.  It's the same honest.  I photographed on a white background.  Obviously need some lessons in digi manipulation.  Who's got time for that!!  Had another idea.  Something profound I said earlier but it's late, or maybe early and I might not have time to take another shot at this later so I'm going to link it in to the fun at

PaperArtsy
Simon Says Stamp Monday Challenge - Carnival because I think it's wild and fun colours.  Also PaperArtsy fans should check out this link cos Suzz made a masterboard using fresco paints and it's fab.  

Thanks for dropping by.  Good night, God bless, may sweet dreams and inspiration find you. 

Saturday, 24 August 2013

Oh Christmas Tree dee dee dee dee......

Hi blog friends.  Welcome to a festive edition of nomad wanderings.  It's Beat the Christmas Rush deadline today for this month so here's what I've been working on.....


Blingy cards always look so nice in person, so to speak, and are rarely photogenic!!  Anyway.....  I've used a green card blank that I swiped with galaxy gold Brilliance ink.  The frame and backing paper are from the stash, I don't know the maker.  I cut an aperture in the tree paper and then ripped a bit more off to give the white edge.  I stamped the background in silver ink with various snowflakes from Papermania Sleigh set.    The tree is Memory Box Frosted Christmas Tree which I have added red glitter glue to.  A couple of glittery flourishes cut using Sizzlit flowers with stem and leaves and a die cut Season greetings with green glitter paper backing.    I've got  a couple more trees glittered up.  Just waiting for them to dry and the plan is to make a couple more of these later.  I'll update with a photo and my running total for BtCR.  

Joining the fun at
Me and Mine - Beat the Christmas Rush  Total to date 21
Joan's Garden Challenge - Christmas Card
Papirdokkene Utfordring 49 - Julen
Kort o Mania Utfordring 91 - Blomster 

Hope you are having a sunny Saturday.  Thanks for dropping by. 

Thursday, 22 August 2013

Learn Something New Every Day

Good evening followers and friends.  A special hi to my most newest followers.  Our little band grows.  Thanks for all your support. 

I really believe that we should all try and do something new or learn something new every day.  It is so easy to fall into the same routine and not take the time to see things from a different angle or just try something new.  So I thought I would share with you a few of things I learnt today. 

Make your own mask from one of those dies you have.  It's fun and easy but make sure if you are going to use it with a 'wet' medium, and lets face it most of them are, then maybe you should consider something a bit more hardwearing than card.   

When spreading texture paste on your mask, a piece of card is not the best applicator due to the wet medium theory discussed above.  If like me you are very loyal I would suggest one of the store loyalty cards that are taking up too much space in the wallet/purse/pocket book.  Not your current credit card though cos you may need to be buying some more crafty goodies soon and the texture paste plays up the card reader something rotten. 

Smile when it goes right.  Smile when it goes wrong.  You might get wrinkles but they will be happy ones and whatever the outcome a smile restores the soul. 

OK, that's my little bit of wisdom for the evening, on to the craft.  I have been spending quite a lot of time over at PaperArtsy.  They have their birthday thing going on and a new post every evening this month and this week Carol Quance is back with some fun projects.  She has given some insight into the design process.  I usually don't know exactly where it's going until I get there, they say it's the journey not the destination, so it was quite nice to go through the steps of the design with Carol.  As she suggested I started with a stamped image.....


This is from PaperArtsy Bricks and Mortar SIBM4.  I coloured it with Butternut and Galaxy Markers. 


Then I assembled some more bits.  I am using the Tando Creative Home Sweet Home Plaque.  I decided to use Leandra's texture paste/stamp technique for the texture.  I made a mask with circles using a spellbinders die, added texture paste and stamped with small stamps from PaperArtsy LPC022, LPC001 and SM12
I wanted my plaque to be bright so picked reds/orange/yellow as my colours.  


Unfortunately I didn't have fresco paints in the right colours.  These I used didn't sand well over the texture areas so I cheated a bit and daubed on some white paint.  


The house is painted with PaperArtsy fresco paint Pansy then stamped with Hampton Arts I Love Thee stamp.  This was the biggest text stamp I had and I thought the lovey quotes were quite apt for my home sweet home plaque.  The roof bit has been painted, stamped, no don't like that, painted, doodled on, no don't like that, painted again in white.  I tried the Magic Roundabout mask from Crafty Individuals with more Pansy paint.  Me likey.  Then I decided to add iridescent glitter glue for a fab finish.  I use this quite a lot and never really know how it's going to turn out.  It looks different on different colours.  That is white and Pansy under there, honest guv'nor.  I used the same glitter glue on the polka dots on the house image and a birdie from Stampotiques Birdie Up has appeared at the window.  He's in the Limelight! 


The letters also got the I Love Thee stamp treatment with added glitter glue.  Love the texture made by stamping into the texture paste.  

This little project is joining the fun at
PaperArtsy
Tando Creative Challenges - Feel the Heat
Stampotique Designers Challenge 112 - Polka Dots 
Crafty Individuals

Hope you are having a great week.  Thanks for dropping by and staying with me through this long waffley post.  

Saturday, 17 August 2013

Catching Blue Dreams

Good evening everyone and welcome.  A special welcome to Martha and Trisha who have recently joined the following.  Welcome, welcome, one and all.  We are looking after the neighbors dog this weekend and I have just taken him out for a walk.  Or maybe he took me!!  I was hoping to be back before it got dark and started to rain but failed with both.  Isn't it great to be a dog and just have to shake.  

There are a couple of monochrome challenges at the moment so I decided to go with my favourite colour.  BLUE, you can't have enough BLUE.  So many shades of BLUE.  Gosh........

Also over at Cheery Lynn they suggested we have Fun With Letters.   Hmmmmmmm......  So I had a look through the stash to see what phrases or alphabets I could come up.  


I started with a pale blue card.  I cut a Cheery Lynn Pocket Watch.  This is one of their brand new dies and I love it.  Fantastic detail and it comes with an angel wing as well.  Anyway, I used this as a mask with DI Salty Ocean and then spritzed with water.  I reversed the diecut mask a few times just to keep it interesting.  Time has no direction in our dreams.........   I had masked off a border around the edge but when I started to add the other elements this looked boring, so I ripped around the edge of the pocket watch background, matted on pale blue glitter card and then on a dark blue card. 


You need to see this close up to get the details.  I wrapped the card with some Basic Grey Granola Fibers.  I cut a Cheery Lynn Spider Web Mesh Border, this is sooooooo gorgeous,  and added some gems.  I cut Imagine with a Tim Holtz Movers and Shapers Die.  I decided I needed dream as well.  I used American Crafts fabric Thickers in black which I covered with blue glitter glue.  There's the CLD Pocket Watch again cut from the pale blue glitter card with a pale blue background.  There are hands also supplied with this die but since I was starting to get a dreamy feeling I decided to use the feathers from CLD Dream Catcher #2.  This is a gorgeous little die.  I think it's excellent value and it cuts all that detail on the feathers.  Fantastic.  So because I was feeling a bit like I was making a big square dreamcatcher I cut more feathers and hung them on the fibers.  A couple of CLD mini dimensional butterflies in shades of blue and voila.....

Joining the fun at
Cheery Lynn Designs - Fun with Letters
That Craft Place - Monochrome
Simon Says Stamp Wednesday Challenge - Monochrome
Simon Says Stamp Monday Challenge - Make the Cut
Craft-room Challenge - Bingo (blue,mask,gems) 

Thanks for taking the time to drop by.  I hope you are having a fun, fab, crafty weekend.   If you have the time or the inclination leave me a little love so I know you passed by.  Craft on good friend, craft on..... 

I was one of the Top 3

Wednesday, 14 August 2013

A New Heart For Piggyfeather

Good evening everyone and welcome back to a session of midnight crafting.  I am not a morning person.  Never have been.  Always do my best work evenings and into the wee smalls.  I know there's folk out there saying I'm missing the best bit of the day!  The birds are singing and the cock is crowing.  Not here matey.  Ninja takes after me.  He's a nine o'clock starter.  Yeah really!  I used to have one that got up at four in the morning and thought everyone else should be up then as well.  So glad Ninja isn't an early riser.   I do try and get up earlier now and again.  It's always worth it when the sun is shining and they say the sun will be shining tomorrow so maybe.......

Over at PaperArtsy the birthday celebrations are in full swing.  France is strutting her stuff and what great stuff it is.  I've been inspired by her first post this week where she coloured and stamped on a wooden heart.  I've gone for a slightly different colour scheme, mostly cos I am sadly lacking in red, both alcohol inks and fresco paints, but do have a goodly selection in the green blue range......


I started with this chunky wooden heart which has quite a rough finish.


I coloured with slate, mushroom and bottle alcohol ink and blended with a paint brush cos I don't have blending solution.  A bit of an alcohol ink novice really.  


Overpainted a layer of PaperArtsy fresco Inky pool.  It was a bit green so added a layer of Pea Coat.  Stamped a flower in Pansy, that's the paint colour not the type of flower, and a small heart in Snowflake.  Both stamps from PaperArtsy SM12.  


I have decorated both sides so I was looking for two sentiments.  Finally decided on Lots of Love and Have a Beautiful Day, both stamps from Papermania Birdsong set, stamped on pale blue handmade paper and then torn.  Glad I left the string white, it matched the paper edge.  


Joining the fun over at
PaperArtsy

Thanks for dropping by. Hope you have a great day, whatever time it starts for you.  Don't forget to be crafty.