Tuesday, 28 January 2014

Work Hard, Play Harder

Hello.  Welcome.  Life is busy.  Time goes fast.  Oooffff.  Sharing an ATC tonight.  I made an abstract background in this post and I have used part of that for my ATC.  I recently purchased the Spooktacular Stamp Set from The Greeting Farm.  I found them hiding in a dusty corner of a craft shop and just had to grab them.  So cute.  Over at Splendid Stamping the challenge is red, white and blue and use an image from the Greeting Farm so.......


Over at Wicked Wednesday the challenge is team colours.  I'm going red, white and blue for Team Norway!!  Looks like this little guy had a rough match!  I used the abstract background and painted a red border.  The sentiment was computer generated and means Get Well in Norwegian.  I thought the mummy from the spooktacular set could double as a hospital case.  I also cut a pennant banner from a spare piece of the background and added some red and white details and also drew on some white stars.  Can you believe in all the stash I failed to turn up a star stamp!!  Found many stamps I had forgotten I owned but not a star to be found.  Then I had a eureka moment and discovered I could draw stars with a white pen!  Amazing eh?  Maybe not the best stars but..........

My ATC joining the fun at

Thanks for dropping by.  Hope you aren't having too much weather.......

Friday, 24 January 2014

Freestyle

Hello.  Welcome.  Hope this isn't going to be boring for you.  It's another post featuring my new favourite technique by Ellen Vargo.  In my last post I followed her colours closely.  This time I decided to go blue.  This was also inspired by the challenge over at The Greeting Farm which is red, white and blue, but more of that later........

I liked all of Ellen's posts and decided in addition to the background I would take some of the techniques from her tag post.


So I started with 4 blues.  The lightest has been a bit obscured and it was looking very dark before I added the red and then the white.  That brought it back to life. 


Sorry, overexposed but I've included it to show the additions at this stage.  I have stamped with DI Salty Ocean but it doesn't show in the photo.  I used a Hero Arts stamp to add some stripes in white but it was too structured so I knocked it back with a baby wipe.  You can still see them middle top but they are nicely muted now.  I added white dots and some words in black on the LHS.  


I cut a piece from the LHS to make this DL card.  I added a red border on two sides.  I wasn't brave enough to use paint so resorted to a red paint marker.  I outlined with white pen.  My Prima Doll stamp is paper pieced and I put lace around the bottom of her skirt.  


Here you can see the black word stamping more clearly.  The 18 is diecut in black card and mounted on a metal tag.  I drew a thick black line across the top of her skirt to look like a belt and added a metal butterfly from Korthobby as a buckle.  There are three mini pearls from Storyteller on her alice band and another one in the hole of the tag.  The Gratulerer (Congratulations) is a Kort og Godt stamp.  

My 18th birthday card is joining the fun at

Thanks for dropping by.  I have a lot of this backgroud left and some ideas of how to use it so I am sure you will be seeing it again soon.......

Take care.  Keep warm.  Off to check out the latest PaperArtsy post......

Thursday, 23 January 2014

Following the Recipe

Hello.  Welcome.  The Arctic wind is blowing.  It's icy cold.  Would love to stay in and craft but sometimes we must be outside.  Even when it's cold.  But definitely before it snows, which is Saturday they say.  Brrrrrrr.  Anyway, did some little jobs, checked the animals had plenty food and for frozen water, a problem at these temperatures.  Then the wind blew the roof off one of my rabbit cages!  Lucky there was no-one home but it gives me another job to do!!  OK, now it's time to craft.........

More amazing amazingness happening over at PaperArtsy this week.  Ellen Vargo is going all abstract and I am loving her bright colours.  I decided to try the cards project.  I followed her process quite closely to get my background.   Warning, lots of photos.......


I don't have so many Fresco Finish colours so I just used what I had.  I did start with Limelight, added yellow, orange,  Inky Pool red and white.


Added some book paper and stamped with the orange paint using a swirl from PaperArtsy SIDD5 and the little round stamp from SIEN10F.  Then I added some white splats using my Crafty Individuals Splat stamp.


I cut my abstract background into four and then one of the pieces in two again.  I went round the edge of all the pieces with Memento Tuxedo Black.  I mounted the three large pieces on white card bases and the two smaller pieces on black cardstock. 


I used the two small pieces to make bookmarks.  That's Ding Dong bird from SIDD5 on bookpaper and a pile of those little circle stamps.  Been a while since I used him.  The other one I diecut letters to spell Good Book in Norwegian.  No honestly, not a spelling mistake, not an "o" shortage, it's Norwegian. 


Close up.  I added some stamping in black with the little circle stamp from SM12 because once I added the letters the open spaces just looked a little empty.  Amazing how effective these little stamps can be.


My bookmarks joining the fun at
Papirdokkene Utfordring 55 - Bokmerker

For the cards........


I searched all my stamps for a suitably large stamp like wot Ellen used and came up empty.  Then I thought about diecuts.  Sizzix Umbrella Man to the rescue.  Here he is bookpaper style with a Hero Arts greeting. 


Here he is man in black.  He might get a sentiment later.  Or maybe not.........


Here is the man in black with some dots stamped in the white paint.  Looks like it's raining just on him despite the umbrella.  Sentiment a la computer. 


Three cards joining the fun at
Kortudfordring Utfordring 100 - Noe Nytt this is a new technique for me

Thanks for dropping by.  Take care, keep warm......

Tuesday, 21 January 2014

Monster Love

Hello.  Welcome.  Big hello to Pam.  Glad you joined my happy following.  I think we are in a lull between storms.  Hoping the weather gets a little less extreme.  It seems to go from all to nothing and back again at the drop of a hat. 

I have been working on a cute little ATC.  Even a monster needs love you know.  He looks a little sad so I am sending happy thoughts and hopes that he gets a kiss for Valentines. 


I painted my ATC with PaperArtsy Pansy Fresco finish paint.  Then I mixed some Limelight FF paint with some texture paste and put it through That Special Touch Of Bamboo mask.  The little monster is MME Blackbird chipboard element.  I added a bubble sticker heart. 

Joining the fun at
Wicked Wednesday ATC Challenge 119 - Hearts & Love
Bunny Zoe's Crafts January Challenge - Stitching

Thanks for dropping by.  Back soon with more crafty madness.......

Sunday, 19 January 2014

Worry Cushion

Hello.  Welcome.  This is gonna have to be quick cos folk are asking about dinner!!  Huh!  Oh.... yeah......  I had something I had to do........  Sometimes I think I need to cancel mundane life.  Over at PaperArtsy, oh yeah, it's all their fault the fish is still frozen!  OK, maybe not all their fault.  But there was such a lot of things I wanted to try......   May have something else later cos I got a few things on the go but finally realised getting one thing finished was a good idea!!  Are you ready for this?  


I have these cotton bags I got from a previous job so I started by opening it up.  Then I painted the bottom third with very thinned Inky Pool.  Dry dry dry.  That's the sound of the impatient crafter.  I stamped with Memento Tuxedo Black, hoping it wouldn't blur too much, using stamps from PaperArtsy SIDD5 and USFD1.   Then I realised I needed to cut it in half so I could get the arms in.  I also stitched a piece of lace along the top of my glorious blue bit.  


Ta dah!  Bet you weren't expecting that were you?  I didn't have the same stamps so I used a stamp from ELB04 for her eyelashes.  The round circles I used an empty tealight holder and the centers are a small stamp from SIEN10F.  I may add buttons but I quite like the eyes.  Her feet are a piece of fleece, her hands felt with red embossing powder finger nails!!  Do check you are using real wool felt.  If it's manmade fibers it may melt in the face of a determined heatgun!  It would have been much quicker to use a red pen maybe but I was hoping for a nice glossy red effect.  After quite a few layers we got there.  At least it won't come off in the rain.  Wool hair and her mouth is a die cut leaf which I stitched on.  I cut it with a die from Cheery Lynn BAF#1 set.  And scary monster, that's my sewing machine, was quite co-operative.  Only threw a few wobbles!  

Joining the fun at
PaperArtsy
WOW - Fabric 
Simon Says Stamp Monday Challenge - Anything Goes 
Bunny Zoe's Crafts January Challenge - Stitching 

If you would like to make one of these gorgeous creatures for yourself check out this post.  

Thanks for dropping by.  Hoping I might get a chance to finish another project before the deadline but must feed the hungry man first.  Take care.  Hope the weather is being kind to you. 

Saturday, 18 January 2014

Snow Business

Hello.  Welcome.  Special big hello to Dotty Jo who has just joined our elite following.  She also linked next to me at CCC so I will be getting to see some of her lovely work up close and personal.  Yippeee!

It's cold, it's windy, me no likey.  Decided to work on a snowy project.  Brrrrrrrr....


I used a blue base card and added a layer of paper from DoCrafts Wellington paper pack.  I also used this behind my LOTV snowman image from their Winter Wonderland Art Pad.  I have distressed the edges of all these layers and added VersaMagic chalk ink in Aegean Blue and Night Sky.  I've used Cheery Lynn Tiny Bubbles Border which I backed with a piece of paper from my inky stash.  That's bits that have had some organised or dis-organised inking!  I think this was a spritzed DI rainbow experiment.  I liked it was mostly blue with just a hint of other colours at the top end.


I cut two Cheery Lynn Snowflake 2 from blue glitter paper and put them behind the snowman.  I also cut the flourishes that come with Cheery Lynn Celtic Fire Oval Frame  from glitter paper.  I have put these opposite corners and then added a variety of elements from Cheery Lynn BAF #1 and BAF #3 Embellishments, all cut from pearlecsent card.


I was going to use glitter glue for the centers and then I decided to use Tiny Bubbles Border again!  Did you know as well as a lovely border you also get over 400 little dots in two sizes?  I have little dots all over my craft space!!  I knew they would be useful.  Don't they just make the most perfect flower centers?


The sentiment is a Crafty Individuals stamp.  I had ink on the rubber around the sentiment but thought I'd stamp it anyway and see.  Usually I'd be going a little crazy to see that extra ink but I like the effect.  A bit like a mini-snowdrift.  Mounted it on a bit more glittery card and on foam pads.  

Joining the fun at

Gosh, this should have been done hours ago but blogger wouldn't let me write a new post.  Have resorted to my old machine which suggests it's maybe not blogger but my laptop!!  Will have to have a look.  Hope it's not coming down with anything nasty!!  Thanks for dropping by.  Keep warm and safe.  Back soon.......

Friday, 17 January 2014

In a Beautiful Balloon

Hello.  Welcome.  It's a little bit windy here.  Can't-stand-up-in-it-windy.  It's been howling and blowing for two days and they say we will have two days more!!  Oh, goody.  Time to craft. 

At the end of 2013 a few challenges I regularly joined finished.  So I have been looking around and found a few new ones to join in with.  This opens up new opportunities to be inspired by new DT's, by fellow crafters I may not have previously met and to see new ways to use items in my stash.  One blog I came across is running something called the Card Chain Challenge.   It's an interesting idea.    You make a card using a wide range of criteria set by Deborah.  Then you link up.  The card you make you send to the person who linked before you on the list.  The person who links after you sends you a card.  Everyone wins!!  I thought I'd give it a go.  It's always nice to receive snail mail and this will be surprise mail from someone you probably haven't met.  What fun.  So I have linked up and will be sending a card to Greta in Oregan.  Hi Greta.  Still a couple of days to link up.  Check it out and join the fun. 

I have completed one of the many unfinished projects on my desk.  I made a card using an image from Paper Smooches and the colours from their picture inspiration...


I downloaded a couple of free digi images from Paper Smooches, one of which was a very cute squirrel.  He was hanging from a Hi but I thought he really needed a balloon.  This then gave me an idea to include The Craft Barn's Q & L Challenge.  

 
I used a piece of ds cardstock from The Little Yellow Bicycle for the card base.  I added a layer of yellow construction paper embossed with Sizzix Rays and added a hint of a tint.  The balloon was cut using a DoCrafts die and embosssed with Sizzix Cirque.  I distressed the edge and used Memento London Fog on the edge and also on the embossed area.  I printed the squirrel onto white card, coloured it very lightly with pencil and cut it out. 


I attached him to the balloon using dark grey embroidery thread and added some computer generated words.   That's the famous song 'Up Up and Away', lyrics by Jimmy Webb, sung by lots of people......... I did think it was called "Would you like to ride in my beautiful balloon" but turns out that's the first line but not the title.  You probably knew that.........

My card joining the fun at
Paper Smooches SPARKS - Picture Perfect Challenge  
The Craft Barn Q&L Challenge - Smile/Up 
Simon Says Stamp Monday Challenge - Anything Goes 
Simon Says Stamp Wednesday Challenge - Emboss It 

Thanks for your visit.  Hope your aren't having too much weather.  Take care, have a great weekend. 

Tuesday, 14 January 2014

A Little Hoot

Hello.  Welcome.  I've combined a couple of challenge themes into an ATC.  Over at Wicked Wednesday it's Friendship and Paper Smooches have a picture inspiration 


 I've gone with the yellow grey colour scheme and used flowers to represent the dots.  Here's my ATC


I cut an ATC from greyboard and decided to leave it as is.  The letters were cut using Sizzix Movers and Shapers Friends die and the flowers using Cheery Lynn BAF#3 Embellishment die.  I printed the Paper Smooches Owl free digi onto white card, coloured it and cut it out.

Joining the fun at
Wicked Wednesday ATC Challenge 118 - Friendship
Paper Smooches SPARKS - Anything Goes
Simon Says Stamp Monday Challenge - Anything Goes

Thanks for your visit.  Back soon.  Be crafty.

Sunday, 12 January 2014

Girls Just Gotta Have Fun-un

Hello.  Welcome.  The mercury is below zero, the grass is crispy, the stars are bright and its feeling pretty chilly.  Maybe winter has arrived at last.  Me and the hens were out in the garden today.  Me clearing up.  Them making a mess.  Me clearing up their mess.  Sigh!!  But they had fun.  A girl has got to have some fun.  Me?  I'm crafting like a good 'un.  In wool socks.  Got to have warm tootsies to stay focused.  

It's a new year and I have been visiting some new places.  Found myself over at the Lawn Fawn blog where they are celebrating their 4th birthday.  What fun.  Now, I don't have many Lawn Fawn stamps but in the interest of joining in, and in deference to my resolution to use scraps and the stash I have improvised.....


Flushed with the success of my CAS stamped card earlier I had a stamping frenzy.  Not a perfect stamping frenzy, but I never said I was perfect!  I did actually re-do this and center the design but then there was too much white space under so this is the one I'm sticking with.  Wiggly lines and all.......  I used Lawn Fawn stamps from Sweet Christmas, Let it Snow and Happy Everything.  Distress inks Worn Lipstick, Salty Ocean and Dried Marigold.  The sweet little gingerbread lady was stamped using VersaMagic Jumbo Java and coloured with VersaMagic Gingerbread.  The natural choice!!  I used a white pen for the frilly details and mounted her on foam pads.  

My card joining the fun at
Lawnscaping Challenge 73 - Let's Party
Loves Rubberstamps Challenge 85 - Anything Goes
Papertake Weekly - Anything Goes

Thanks for taking the time to visit.  Keep warm, keep safe, be crafty......

Ready to Get Simple

Desk clean - check!
Hands clean - check!
Stamps inked - check!
Stamp edges clean - check!
Card ready - check!
Stamps away...........


Inspired by Joanne Wardle's CAS card.  I used a Crafty Individuals flourish and ink splat.  Memento London Fog and Tuxedo Black.  I stamped the small heart and text stamp from LPC003 onto card, cut it out, coloured and embossed the heart and mounted it on foam pads.  I was a bit heavy with the embossing and nearly made a hole but it has given a pleasing wrinkled texture to the heart.  

Joining the fun at


Thanks for visiting.   Hope you are having a very happy Sunday

Saturday, 11 January 2014

Thoughts of You

Hello.  Welcome.  If you like white on white you should check out this weeks Cheery Lynn Design Challenge Winter Whites, there are some fantastic entries.  Here's mine


I used a white base card.  All the other layers and elements are cut from Papermania White Shimmer Textured Cardstock.  I used Cheery Lynn Tiny Bubbles Border.  The flower were cut using Cheery Lynn Build a Flower #1.  I used Storyteller white pearls in the centre of the flowers.  I cut flourishes using Cheery Lynn Celtic Fire Oval Frame die and also added Cheery Lynn Wheat Heads.  The snowflakes are elements from the Build a Flower #1 dies.  The Thinking of You was cut using Sizzix alphabet dies.


I've used Colourbox Alabaster Chalk ink on the edges of the flower petals. 


My card joining the fun at
Cheery Lynn Designs Challenge 114 - Winter White
Storyteller Ufordring 7 - Snøkrystaller
Simon Says Stamp Wednesday Challenge - Ice Inspiration
Hjerteboden Utfordring 1 - Vinter
Papertake Weekly - Anything Goes
Country View Challenges - Monochromatic

Thanks for your visit.  Take care. 

Dark Art

Hello.  Welcome.  It's a funny thing.  I'm probably talking about my brain, or maybe just yesterday evening which became a bit surreal.  I was wide awake and full of inspiration.  Over at PaperArtsy this week it's just crazy wall to wall everyday inspiration.  I want to try so many techniques but there aren't enough hours in the day.  Anyway, last night I started stamping and we had a power cut.  This was the third one but it didn't just last a few minutes, this was a good 'un!!  Hours!!  Luckily I had done the stamping so armed with one of those light you strap on your head the crafting continued!!!   I even took photo's!!  In the dark!!  Had to take lots.  It's a bit more difficult to see the subject in the pitch black!  I might do this again cos actually some are better than those I take in artificial light.  Go figure!   It was certainly exciting.  Anyway, here's the art.......


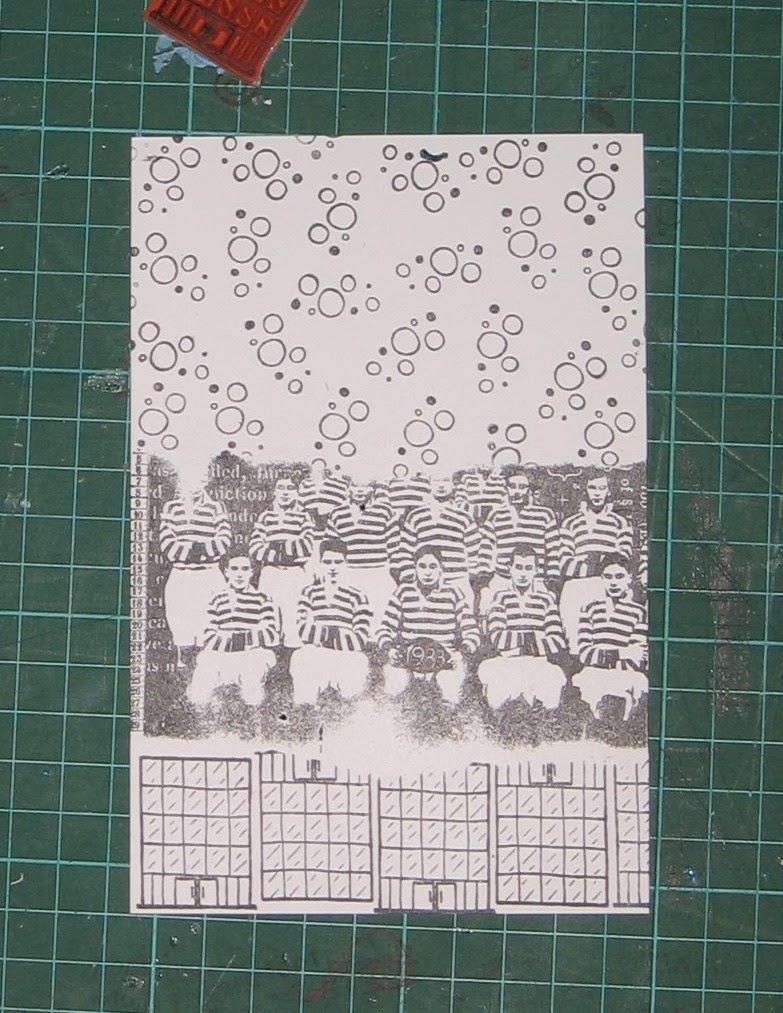
Last night Helen Chilton was over at PA with a fun project.  I started stamping a background with a range of PA stamps.  Some of these have never seen ink!!  Gentleman - Plate 6, a happy xmas to me stamp, made a great central image.  I used the small circles from SM12 because I know I like that, and a block of flats from SIBM4 along the bottom.  I used a piece of torn paper to mask between the images.  Managed to do this before the world was plunged into darkness.  Not a bad photo for in the dark eh?


I didn't have the oil pastels Helen used but hoped that technique this might work with DI.  So, in the dark with just a poor head light I sponged on Mowed Lawn, Salty Ocean and Picked Raspberry.  Probably would have got better coverage if I could have seen what I was doing, but actually quite like the patchy look.  LOL  


Then I used three Tando Creative masks, leaves top left, bamboo group top right and one of the reindeer negatives bottom center.  If you squint maybe you can see the line of his back below the guy holding the number........  I used a babywipe to remove the colour through the masks. 


Here's a bit closer look.  Very pleased with this background considering the challenges.  You never know, maybe it's better because of the power cut!!  Isn't life strange. 


I had a stamp all picked out to finish with but in the end it was too small and vanished into the busy background.  So I went for big, bold simple lines.  My Prima doll is blue,  Dress, hair, scary featureless face. 

Joining the fun at
PaperArtsy
Tando Creative - Bold and Bright
Simon Says Stamp Monday Challenge - Blues
Stampotique Designers Challenge 130 - Something New Prima doll and Gentleman were new for xmas
Loves Rubberstamps Challenge 85 - Anything Goes

Thanks for dropping by.  I love reading all your lovely comments.  Thanks for your support.  My desk overfloweth with unfinished projects so back soon.  Keep warm, cool, dry, anyone want to be wet?  Just so long as we remain crafty.......

Thursday, 9 January 2014

Not Perfect, Just Handmade

Hello.  Welcome.  I have been very inspired over at PaperArtsy this week.  Clare's posts have been fun and varied.  I really liked her CAS card.  Never as simple as it looks.  Not for us messy impatient crafters.  I have included my mistakes because it's nice to see where we go wrong as well as where it goes right........


I masked off an area of my card with masking tape and then stamped using the small circles stamp from PaperArtsy SM12.  I think it's a bit dense maybe but I started colouring.  Then I decided to take off my tape.  Oops #1.  This is an uncoated card and the masking tape has removed some of the surface.  Oh, parsnips!!  It doesn't show in the photo but it's not good.  I like the pattern though so all is not lost.  It will get cut up and have a new life on another project.  Only sharing cos I think it made a nice pattern.  Such a tiny little stamp, one of my all time favourites. 

Next.....


I liked the dots but did think it was a bit dense so decided to redo using all three of the small stamps from SM12.  I used magic tape this time.  Much better.  I coloured with sharpies. 


I had a bit of a hunt but couldn't find anything I liked to take the design across the card.  Then I came across some Hero Arts stamps.  It didn't stamp quite as solid black as I would have liked.  I'm using Archival and the card is a bit glossy.  I often have this problem with solid stamps.  Maybe I'll go do touch up with a black marker, or is it just the perfectionist in me??


I wanted to take the design right across the card so did a bit more work with the SM12 stamps.  Oops again, a slight smudge.  CAS is so not S!!  Anyway, it's here.  Too much invested to bin the whole thing.  Will call it prototype#1, although I rarely repeat myself...........

My card joining the fun at
PaperArtsy
A Blog Named Hero Challenge 35 - 1 & 4  4 stamps, 1 layer
Loves Rubberstamps Challenge 85 - Anything Goes
Kort o Mania Utfordring 99 - Anything Goes

Thanks for dropping by.   Hope your year is off to a crafty start and that you aren't having too much weather!!  It seems a lot of people are.  They say winter is coming to my part of Norway this weekend.  Hope it doesn't hang around too long........

Tuesday, 7 January 2014

Strange Bird

Hello.  Welcome.  Just posting a curious little ATC.  The colours were inspired by Wicked Wednesday where they want Mardi Gras colours, purple, green, gold.  I have also been playing with PaperArtsy SM12 after seeing Clare's posts over at PaperArtsy this week.


I started by painting my ATC with Pansy fresco finish paint and then added texture paste coloured with limelight through Tando Creative Ink Splatters mask.  I stamped SM12, coloured the crown with wink of stella green and the wings with purple and gold.  I added a green feather and a charm from KortHobby.  I used a couple of points that had broken of a crown charm for earings.

My ATC joining the fun at
Wicked Wednesday ATC Challenge 117 - Mardi Gras Colours
PaperArtsy
That Craft Place Challenge - Charming
Loves Rubberstamps Challenge 85 - Anything Goes
Kort o Mania Utfordring 99 - Anything Goes


Thanks for your visit.  Hope you are having a crafty start to the year.

Sunday, 5 January 2014

I Scream Art

Joy! Craft Challenge entry here

Hello.  Welcome.  I have been working on a texture paste technique that Leandra at PaperArtsy shared.   Here's my take.......


I started with a pale blue card base and added a generous layer of Fresco Finish Limelight.  I wanted a bright spring piece.  Then I coloured some texture paste with various acrylic paints and applied them through Tando Creatives Bird and Branch mask.   Very impressed with this effect. 


I sanded back my texture paste to expose more of the rose colour on the bird and also clean up a few places where wrong colour was on top.  I was going to use the girl from PaperArtsy Bloom stamp set but she wasn't big enough so I used one of my new Prima Dolls and added a flower and a sentiment from the Bloom set. 

My card joining the fun at
PaperArtsy Christmas Cracker Video 1 Sanded Foundation
Loves Rubberstamps Challenge 84 - New Year Resolution used scrap card to stamp my doll on
Simon Says Stamp Wednesday Challenge - New Beginnings  new doll stamp
Stampotique Designers Challenge 129 - Anything Goes


I've used my spare texture paste on a giant tag.  Not sure if that will make an appearance at a later date cos at the moment it looks like there's been an accident with some Neapolitan ice cream!!  LOL.  Sylv, you said you didn't realise these doll stamps were so big so for those of you who haven't seen them in the real they are about 20cm high.  Great for LO's and big projects.  I saw a post yesterday where they claimed to have made a little tag with one of these.  Little?  Yeah, right.  They are lovely to use though and I like the simple lines.   I think they may become a favourite.  I think she looks perfect here.  

Thanks for dropping by.  Wishing you a fun and peaceful Sunday.

Saturday, 4 January 2014

Banana and Custard

Hello.  Welcome.  Hope you aren't having too much weather. 


Wot Christmas already?  Just wanted to test drive my new God Jul stamp from Panduro.  The base card is Authentique paper.  The tree is from Memory Box Frosted Christmas Tree cut from My Minds Eye Lizard Egg paper.  It's blue but it seems to have acquired a green tint whilst I was trying to adjust by background back to white!  The Russian Doll is a Marianne die.


I cut the inside using Joy Crafts Open Up Christmas Snowflake die.


I attached a second Russian Doll die to the snowflake so she pops up when the card is opened.


Isn't she cute.  Did think about giving her a snowflake in place of her flower but I think we need a few flowers in winter.  All my inks were various blue shades.  DI Salty Ocean, VersaMagic Ocean Depth and Aegean Blue

My very blue card is joining the fun at
Joy! Crafts - Winter Challenge
Hjerteboden Utfordring 1 2014 - Vinter
Emergency Crafters Challenge January 2014 - Cold
Country View Challenge - 'MONOCHROMATIC'
Artful Times Challenge 46 - Blue

Thanks for dropping by.  Lurkers welcome.  Comments gratefully received.  Be safe.  Be crafty.

Friday, 3 January 2014

Every Girl Needs Butterflies

Hello.  Welcome.  I would like to wish you a very Happy New Year and all good things in 2014.  Have you made resolutions?  A new year ahead and it's a good time to address the things that we have been putting off, or start something new, or both.  I have decided to use more of the scraps, to try and tidy up as I go along and get more organised.  Nothing major.  Just a few things which should be very do-able and will make my life easier.   We shall see.......

The Prima doll stamps have been around a while and the more I see them used on beautiful projects the more intrigued I become.  So just before Christmas I treated myself to one or three and here's my first project using the ball-gown doll stamp.  These are lovely but BIG.  I was thinking I might have to invest in a huge acrylic block when the cutting plate of my bigshot caught my eye.  Perfect!!


I wanted to make a thank you card for a young woman, although I may frame this as it's a big card, 7" x 9" in old money.  The colour scheme is courtesy of the December colour challenge at A Sprinkle of Imagination where we need to used at least 3 colours from ebony, mauve, peony purple, golden rod and rich orange.  I wanted to paper piece the skirt so I selected a variety of papers from the scraps and stash that I thought matched the palette.  Some I added stamping too for a bit extra interest.  Others are as found.   The orange base is a sheet of Making Memories Spook Street paper.  I embossed some mauve paper using Cheery Lynn Designs Diamond and Starburst embossing plate then highlighted with DI Dusty Concord.  The oval frame is Cheery Lynn Designs The Emperor's Swan die.  One day I'll use the swan but this frame is just so gorgeous by itself and it fitted perfectly here.


I have used my mauve Wink of Stella brush on the bodice and her hair band.  So pleased this photo caught the glitter effect.  I used Distress Stickles Black Soot for her hair. 


A close up of the skirt.


The sentiment is a Hero Arts stamp.  The butterflies were cut using Cheery Lynn Mini Dimensional Butterflies die. 

My lovely lady is joining the fun at
A Sprinkle of Imagination - December Colour Challenge
Cheery Lynn Designs Challenge 113 - Thank You
A Blog Named Hero Challenge 35 - 1 and 4 one lady, four butterflies
Simon Says Stamp Wednesday Challenge - New Beginnings Prima doll stamp is new 
Bunny Zoe's Crafts - Our Last Challenge of 2013 Wings

Thanks for stopping by.  I hope Santa brought you lots of lovely new stash and I wish you happy crafting.